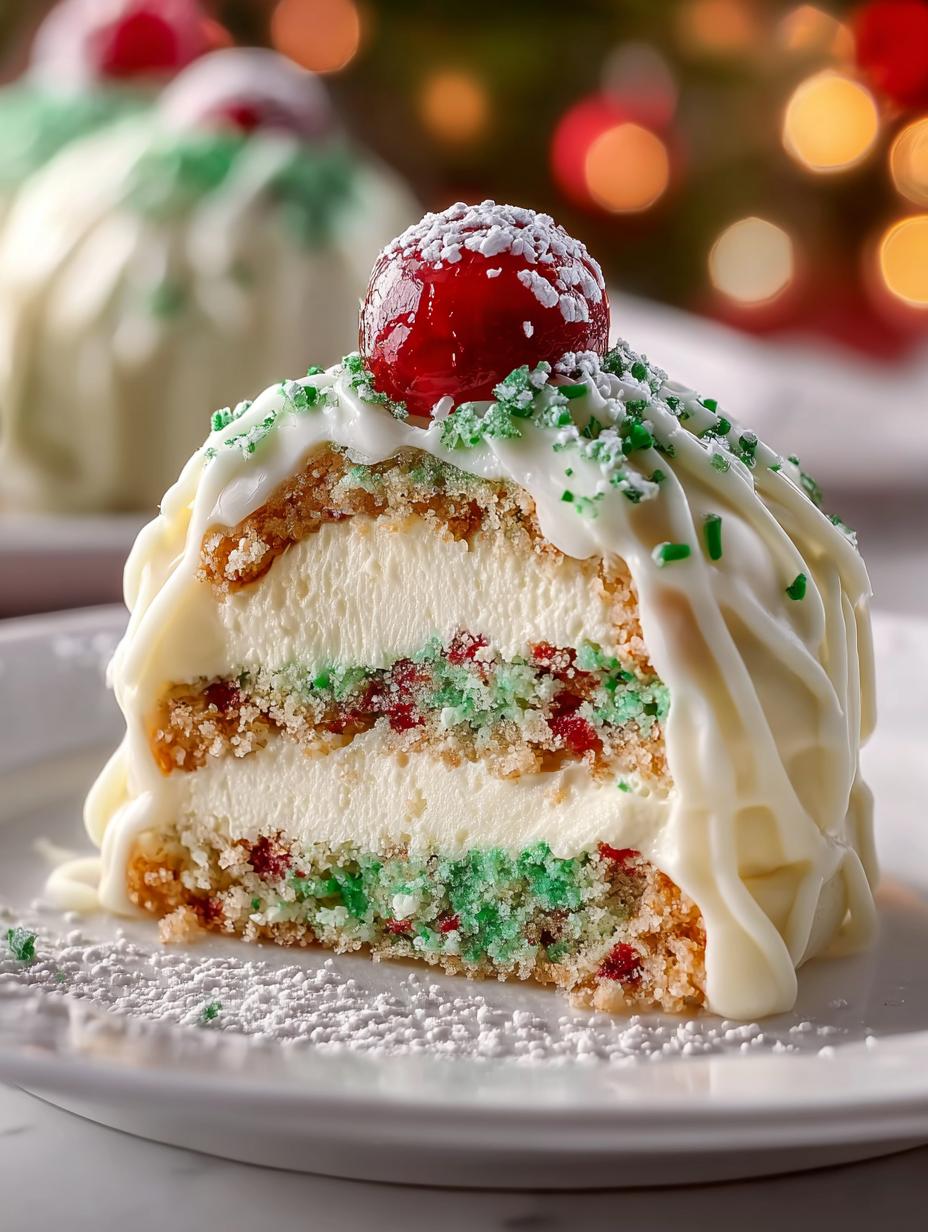
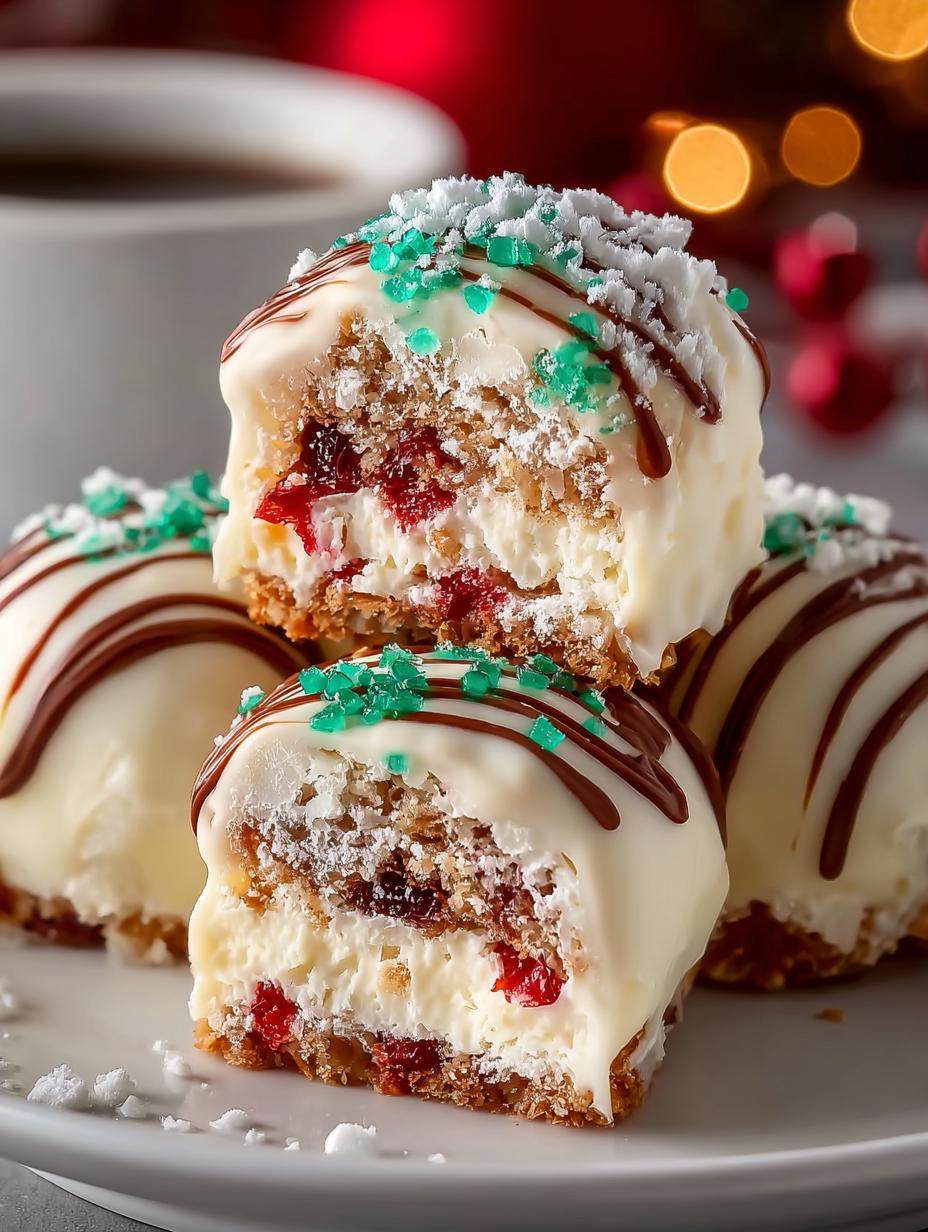
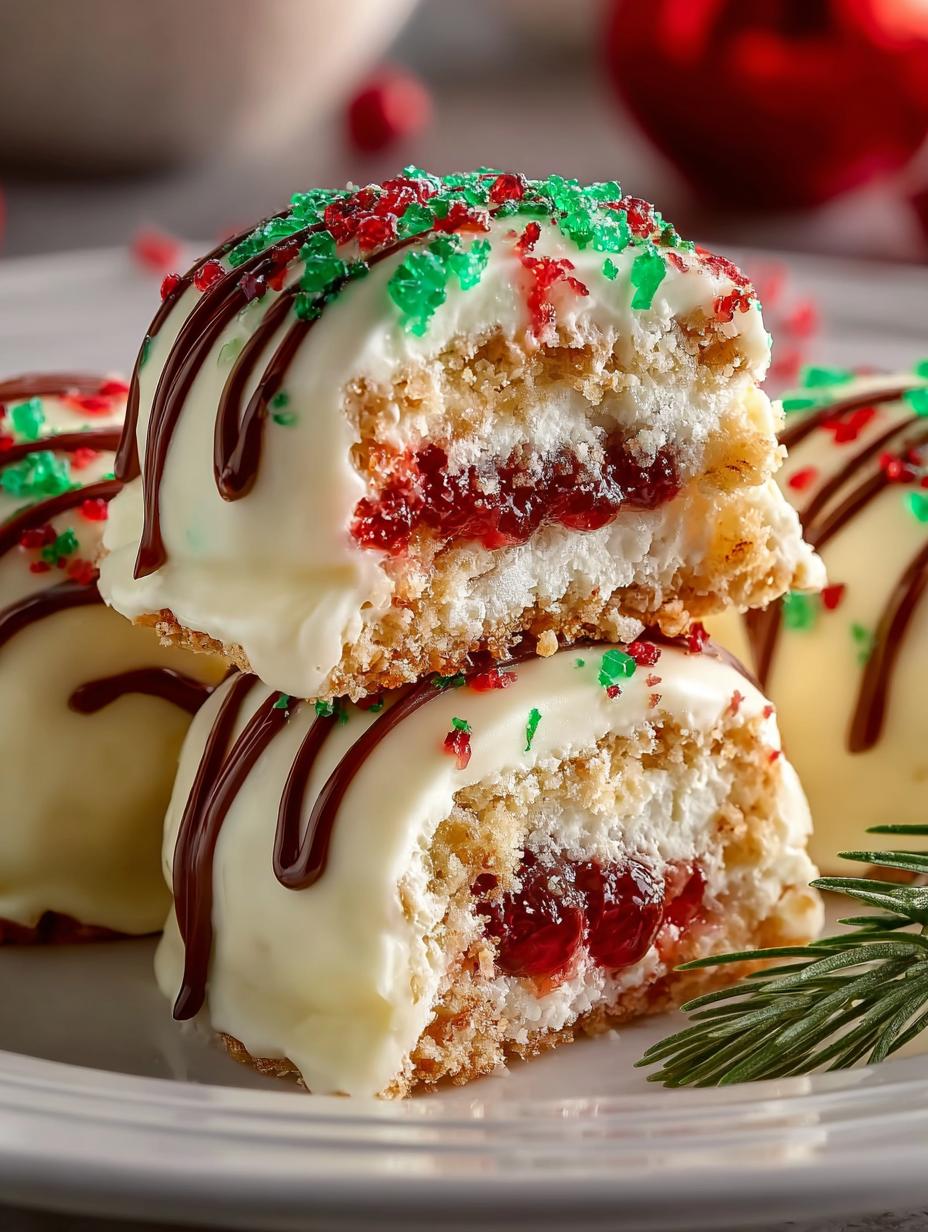
Little Debbie Christmas Tree Cake Balls are a festive delight perfect for holiday gatherings, blending delicious vanilla cake with cream cheese and white chocolate. These cake balls capture the essence of the beloved Little Debbie Christmas Tree Cakes, making them an ideal treat to share during the holiday season. Their vibrant green and red colors, along with their delightful taste, evoke the warmth and joy of Christmas. Whether you’re hosting a holiday party or simply indulging in seasonal treats, these cake balls will surely bring smiles to everyone’s faces.
Why You’ll Love This Little Debbie Christmas Tree
Here are a few reasons to love these delightful treats:
- Easy to make, perfect for holiday baking.
- Kids and adults alike will enjoy these festive tree cakes.
- They are a unique twist on traditional Christmas desserts.
- Perfect for holiday parties and gatherings.
- Great for gifting or sharing with friends and family.
- Utilizes popular Little Debbie Christmas Tree Cakes for a nostalgic flavor.
- Suitable for vegetarian diets as they contain no meat products.
Ingredients for Little Debbie Christmas Tree
Gather these items:
- 10 Little Debbie vanilla Christmas tree snack cakes, unwrapped (from 2 – 8.62 oz. boxes)
- 8 ounces cream cheese, softened to room temperature
- 20 ounces white chocolate melting wafers, Ghirardelli brand used
- 6 ounces red vanilla flavored melting candy wafers, Wilton brand used
- 1 tablespoon green sanding sugar sprinkles
How to Make Little Debbie Christmas Tree Step-by-Step
- Step 1: Line two large baking sheets with parchment paper or a silicone mat and set aside.
- Step 2: In a large mixing bowl, beat the softened cream cheese on medium speed with a handheld mixer for 1-2 minutes until fluffy and smooth.
- Step 3: Break the Little Debbie vanilla Christmas tree Snack Cakes into smaller pieces and add to the bowl of beaten cream cheese. Mix on low speed until fully combined.
- Step 4: Using a small cookie scoop, scoop out a tablespoon-sized portion of the mixture and roll it into a smooth ball in your hands.
- Step 5: Place the cake ball onto one of the prepared baking sheets and repeat until all cake balls are formed.
- Step 6: Freeze the cake balls for 30-45 minutes, until completely solid.
- Step 7: Melt the white chocolate wafers in a medium bowl according to package directions until smooth.
- Step 8: Melt the red vanilla flavored candy wafers in a separate small bowl and stir until smooth. Transfer the melted red wafers to a small piping bag.
- Step 9: Coat each cake ball in the melted white chocolate, using a fork to lift them out and tapping off excess chocolate.
- Step 10: Place the coated cake balls on the second prepared baking sheet. Pipe a decorative zig-zag pattern with the melted red candy and sprinkle with green sanding sugar.
- Step 11: Let the cake balls set for 15-20 minutes until the chocolate coating is firm before serving.
Pro Tips for the Best Little Debbie Christmas Tree
Keep these in mind:
- Ensure cream cheese is softened for easier mixing.
- Freezing the balls is crucial for a clean chocolate coating.
- Use quality melting wafers for a smoother finish.
- Experiment with different colors of sanding sugar for a unique look.
Best Ways to Serve Little Debbie Christmas Tree
These delightful cake balls can be served in various ways:
- On a festive dessert platter alongside other Christmas Tree Desserts.
- Pack them in gift boxes for friends and family as Little Debbie Holiday Snacks.
- Pair them with hot cocoa or coffee for a cozy treat.
How to Store and Reheat Little Debbie Christmas Tree
To keep your cake balls fresh, store them in an airtight container in the fridge for up to a week. For best results, allow them to sit at room temperature for a few minutes before serving. These no-bake treats are perfect for meal prep during the busy holiday season.
Frequently Asked Questions About Little Debbie Christmas Tree
What’s the secret to perfect Little Debbie Christmas Tree?
The secret lies in properly freezing the cake balls before coating them in chocolate, ensuring a clean and smooth finish. Additionally, using high-quality melting wafers makes a significant difference in taste and texture.
Can I make Little Debbie Christmas Tree ahead of time?
Absolutely! These cake balls can be made a few days in advance and stored in the fridge, making them a convenient option for holiday parties or gatherings.
How do I avoid common mistakes with Little Debbie Christmas Tree?
A common mistake is not freezing the cake balls long enough. Ensure they are completely solid before coating them in chocolate for the best results.
Variations of Little Debbie Christmas Tree You Can Try
Here are some delightful variations to consider:
- Use chocolate melting wafers instead of white chocolate for a richer flavor.
- Add crushed peppermint for a festive twist.
- Try different flavor profiles by using different types of cake snacks.
- Incorporate nuts or sprinkles into the mixture for added texture.
For more festive ideas, check out our Irresistible Peach Upside Down Mini Cakes or Pumpkin Pecan Cobbler recipes!
Print
Little Debbie Christmas Tree Cake Balls: A Festive Treat
- Total Time: 1 hour
- Yield: 20 cake balls 1x
- Diet: Vegetarian
Description
Little Debbie Christmas Tree Cake Balls are a festive delight perfect for holiday gatherings, blending delicious vanilla cake with cream cheese and white chocolate.
Ingredients
- 10 Little Debbie vanilla Christmas tree snack cakes, unwrapped (from 2 – 8.62 oz. boxes)
- 8 ounces cream cheese, softened to room temperature
- 20 ounces white chocolate melting wafers, Ghirardelli brand used
- 6 ounces red vanilla flavored melting candy wafers, Wilton brand used
- 1 tablespoon green sanding sugar sprinkles
Instructions
- Line two large baking sheets with parchment paper or a silicone mat and set aside.
- In a large mixing bowl, beat the softened cream cheese on medium speed with a handheld mixer for 1-2 minutes until fluffy and smooth.
- Break the Little Debbie vanilla Christmas tree Snack Cakes into smaller pieces and add to the bowl of beaten cream cheese. Mix on low speed until fully combined.
- Using a small cookie scoop, scoop out a tablespoon-sized portion of the mixture and roll it into a smooth ball in your hands.
- Place the cake ball onto one of the prepared baking sheets and repeat until all cake balls are formed.
- Freeze the cake balls for 30-45 minutes, until completely solid.
- Melt the white chocolate wafers in a medium bowl according to package directions until smooth.
- Melt the red vanilla flavored candy wafers in a separate small bowl and stir until smooth. Transfer the melted red wafers to a small piping bag.
- Coat each cake ball in the melted white chocolate, using a fork to lift them out and tapping off excess chocolate.
- Place the coated cake balls on the second prepared baking sheet. Pipe a decorative zig-zag pattern with the melted red candy and sprinkle with green sanding sugar.
- Let the cake balls set for 15-20 minutes until the chocolate coating is firm before serving.
Notes
- Prep Time: 15 minutes
- Cook Time: 45 minutes
- Category: Dessert
- Method: No-Bake
- Cuisine: American
Nutrition
- Serving Size: 1 cake ball
- Calories: 150
- Sugar: 10g
- Sodium: 50mg
- Fat: 8g
- Saturated Fat: 4g
- Unsaturated Fat: 2g
- Trans Fat: 0g
- Carbohydrates: 18g
- Fiber: 0g
- Protein: 1g
- Cholesterol: 10mg