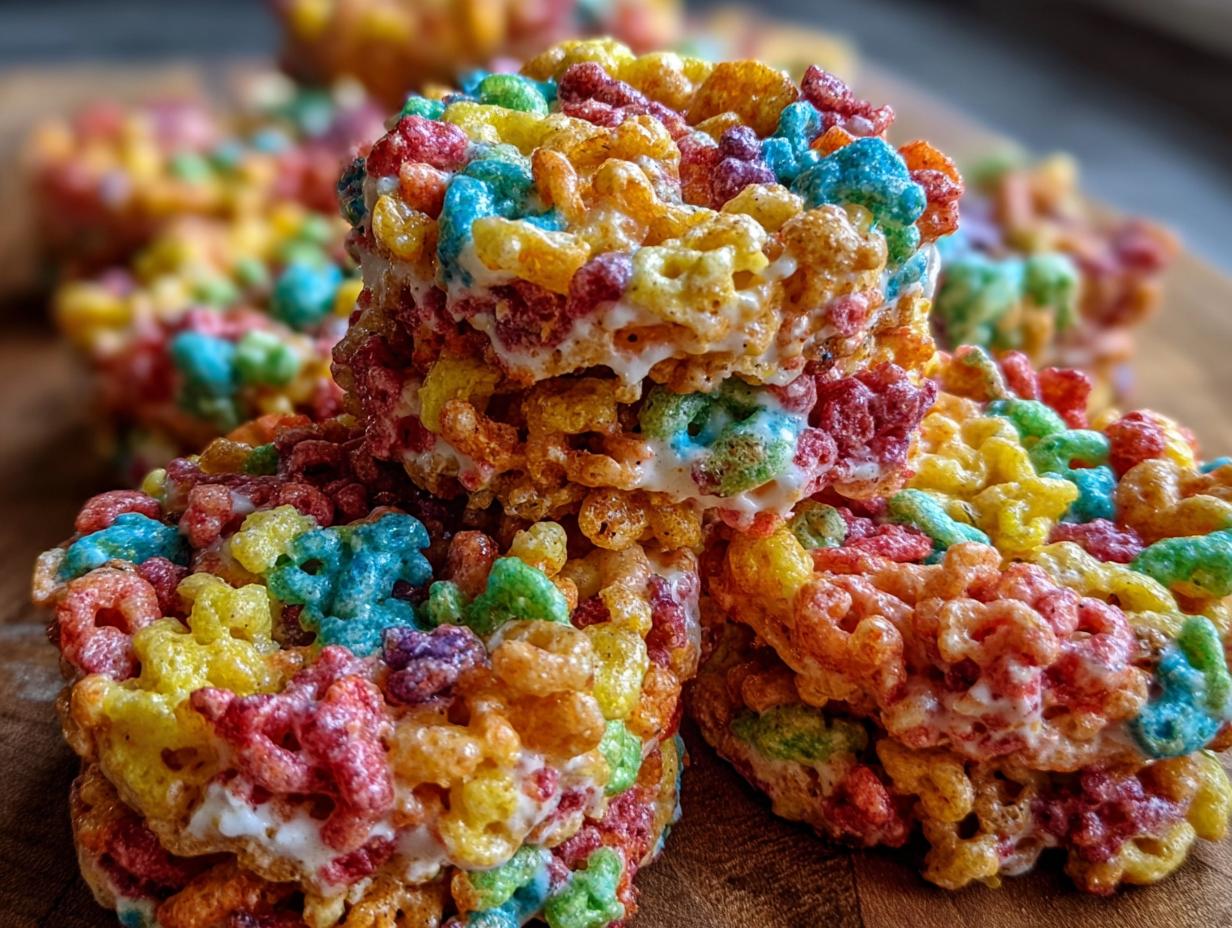
Fruity Pebbles Treats Delightful has been my go-to for a quick, colorful, and incredibly fun dessert since I was a kid. I remember begging my mom to make these vibrant bars whenever we had a party, and the smell of melted marshmallows and sweet cereal filling the kitchen always made me giddy. These aren’t just any treats; they’re a nostalgic trip in every bite, bursting with rainbow colors and a satisfying crunch that’s pure joy. This Fruity Pebbles dessert recipe is so simple, even the little ones can help make it. Let’s whip up some magic!
Why You’ll Love This Fruity Pebbles Treat
Seriously, these Fruity Pebbles bars are a game-changer for so many reasons. They’re a guaranteed hit with everyone, from picky eaters to nostalgic adults.
- Incredibly Easy to Make: This is truly an easy Fruity Pebbles bar recipe that requires minimal effort and zero baking skills.
- Rainbow of Fun: The vibrant colors of Fruity Pebbles cereal make these treats visually stunning and exciting for any occasion.
- Quick and No-Bake: Perfect for last-minute cravings or when you don’t want to turn on the oven.
- Nostalgic Flavor: It’s like a bite of childhood, packed with that classic sweet, fruity cereal taste.
- Versatile Dessert: This easy Fruity Pebbles bar recipe is adaptable for parties, lunchboxes, or just a fun afternoon snack.
- Minimal Ingredients: You probably already have most of what you need in your pantry.
- Crowd-Pleaser: Guaranteed to disappear fast at any gathering.
Ingredients for Your Fruity Pebbles Bars
Whipping up these delightful Fruity Pebbles bars is incredibly simple, and you likely have most of the ingredients on hand already! The magic really comes from just a few key players, making this an accessible Fruity Pebbles dessert recipe for anyone.
- 7 tablespoons butter – This forms the base and helps bind everything together, giving the treats a rich flavor.
- 10 ounces miniature marshmallows – These are the glue that holds your Fruity Pebbles marshmallow treats together, providing that classic gooey texture we all love. Melted miniature marshmallows are easier to work with than their larger counterparts.
- 8 cups Fruity Pebbles cereal – The star of the show! This colorful cereal brings the iconic fruity flavor and vibrant look to your bars.
How to Make These Easy Fruity Pebbles Treats
Get ready to create some seriously fun and delicious treats! This recipe for Homemade Fruity Pebbles treats is so straightforward, you’ll be amazed at how quickly you can whip up a batch of these colorful delights. The aroma alone is enough to bring smiles.
- Step 1: First things first, let’s get our pan ready. Grab a 9×13 inch baking pan and generously rub the bottom and sides with a little butter. This little step is crucial for preventing your beautiful Fruity Pebbles bars from sticking later on. Set this prepared pan aside.
- Step 2: Now, grab a large saucepan and place it over medium heat. Add your 7 tablespoons of butter and let it melt completely. Once the butter is liquid and shimmering, toss in your 10 ounces of miniature marshmallows. Keep stirring gently until the marshmallows are fully melted and smooth. You’ll notice a wonderfully sweet, toasty smell filling your kitchen.
- Step 3: As soon as those marshmallows are beautifully melted, carefully remove the pan from the heat. This is where the magic happens! Immediately pour your 8 cups of Fruity Pebbles cereal directly into the pan on top of the melted marshmallow mixture. Work quickly here – grab a spatula and stir everything together until the cereal is completely coated. You want every colorful flake to be enveloped in that sweet, gooey goodness. This is a key moment for making your Homemade Fruity Pebbles treats.
- Step 4: Now, quickly transfer the sticky cereal mixture into your prepared 9×13 inch pan. Here’s a little trick I learned: dampen your fingertips with cool water. This will prevent the super sticky mixture from clinging to your hands. Gently press and spread the mixture evenly into the pan, packing it down firmly. The firmer you pack, the better your Homemade Fruity Pebbles treats will hold their shape.
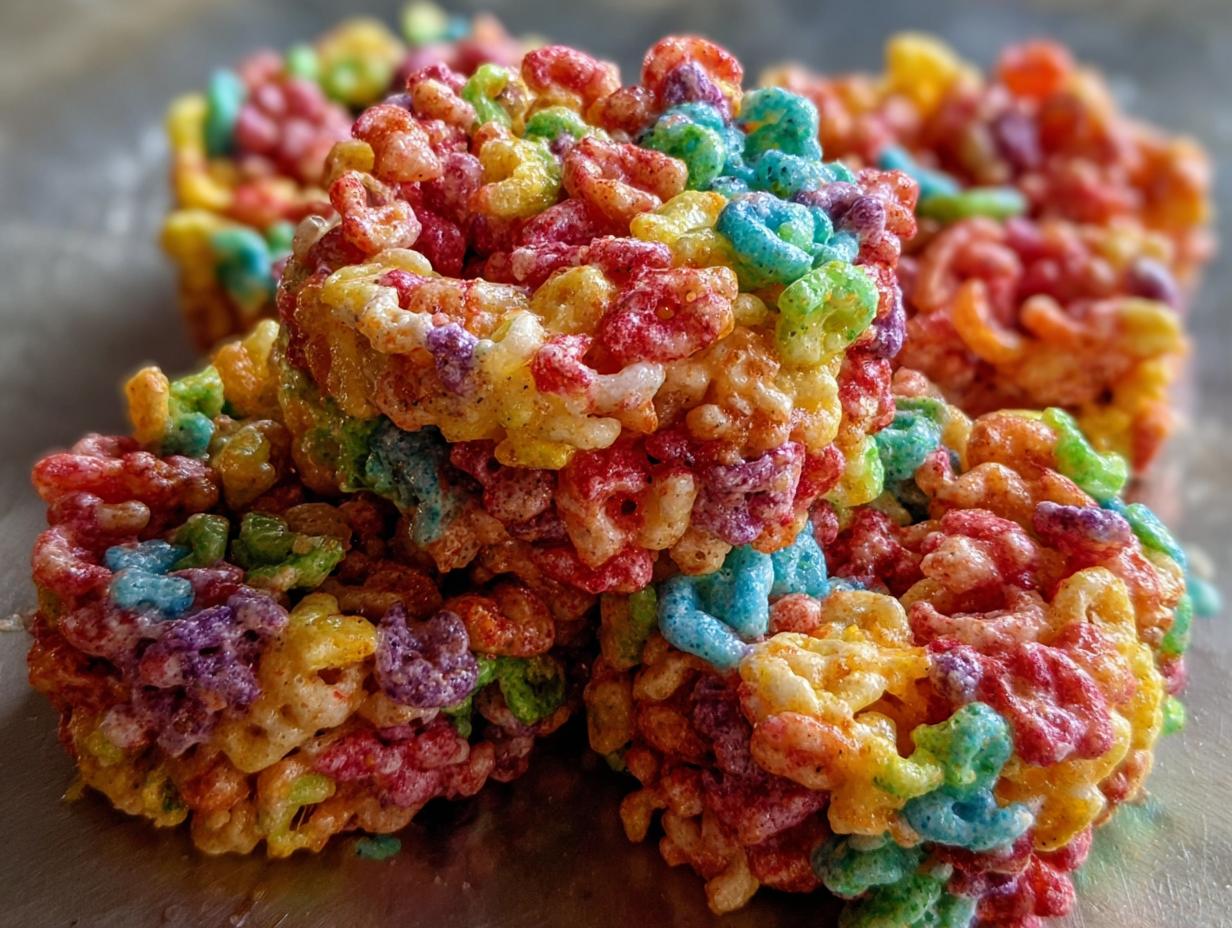
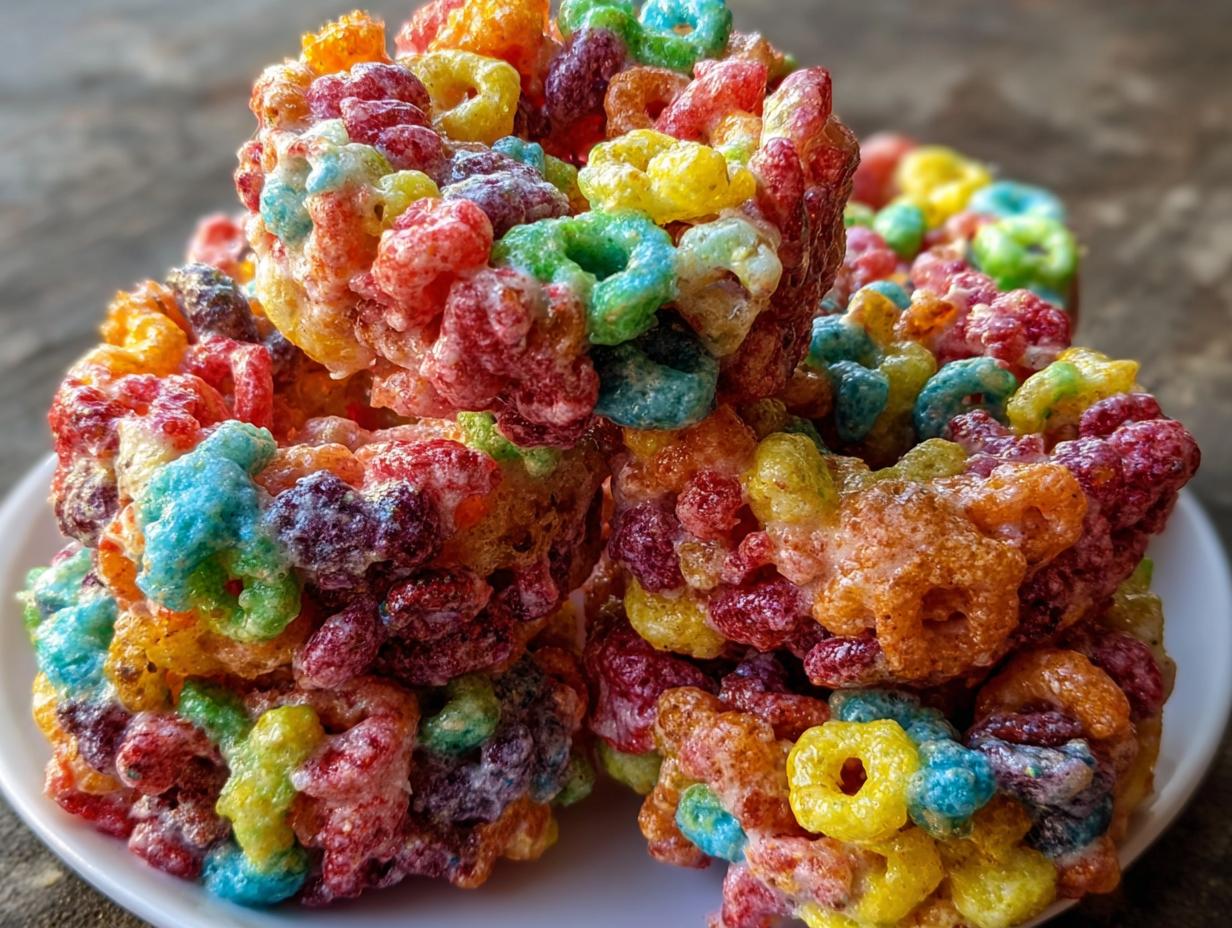
- Step 5: Patience, my friend! Let the treats sit and set in the pan for at least 30 minutes. This allows them to firm up properly. Once they’ve cooled and are nicely set, use a knife or spatula to cut them into delightful squares. Enjoy your vibrant, homemade goodness!
Pro Tips for the Best Fruity Pebbles Cereal Bars
Want to elevate your Fruity Pebbles bars from good to absolutely amazing? I’ve picked up a few tricks over the years that make all the difference in achieving that perfect texture and flavor.
- Always use fresh marshmallows; stale ones melt poorly and can make your treats tough.
- For cleaner cuts, lightly grease your knife before slicing the set bars.
- Don’t press too hard when spreading the mixture; you want them chewy, not dense bricks!
- Consider adding a tablespoon of vanilla extract to the melted marshmallow for an extra flavor boost.
What’s the secret to perfect Fruity Pebbles Treats?
The real secret to perfect Fruity Pebbles Treats lies in the technique: melt the marshmallows gently, stir them into the cereal quickly while still hot, and then pack them firmly but not too densely into the pan. This ensures that classic chewy texture for your Fruity Pebbles no-bake dessert.
Can I make Fruity Pebbles Treats ahead of time?
Absolutely! These bars are fantastic for meal prep. You can make them up to 2-3 days in advance and store them in an airtight container at room temperature. Just make sure they are completely cooled before sealing them up.
How do I avoid common mistakes with Fruity Pebbles Treats?
A common pitfall is overheating the marshmallows, which can make them rubbery. Also, don’t let the mixture sit too long before pressing it into the pan, or it will harden too quickly. Lastly, be sure to use butter to grease your pan and hands to prevent sticking.
Best Ways to Serve Your Fruity Pebbles Dessert
These vibrant bars are more than just a dessert; they’re a whole experience! They’re perfect on their own, of course, but I love getting creative with how I serve them. For a truly Fruity Pebbles fun dessert, consider slicing them into fun shapes using cookie cutters after they’ve set. They also make an amazing topping for ice cream – imagine a scoop of vanilla bean ice cream buried under a cascade of colorful, crunchy Fruity Pebbles bars! For a party spread, arrange them alongside other sweet treats like cookies or cupcakes for a dazzling dessert table.
Nutrition Facts for Fruity Pebbles Treats
These delightful Fruity Pebbles bars are a fun treat, and here’s a look at their estimated nutritional breakdown per serving. They’re a sweet snack that brings a burst of flavor and color to any occasion.
- Serving Size: 1 square
- Calories: 120
- Fat: 4g
- Saturated Fat: 2.5g
- Unsaturated Fat: 1g
- Trans Fat: 0g
- Carbohydrates: 19g
- Fiber: 0g
- Sugar: 10g
- Protein: 1g
- Sodium: 50mg
- Cholesterol: 10mg
Nutritional values are estimates and may vary based on specific ingredients used and portion sizes. For more information on general nutrition, you can refer to resources like the National Nutrition Portal.
How to Store and Reheat Your Fruity Pebbles Treats
One of the best things about these delicious Fruity Pebbles bars is how well they store, making them perfect for making ahead. After you’ve cut them into squares, let them cool completely on a wire rack. This is super important to prevent condensation, which can make them soggy. Once they’re totally cool, transfer them into an airtight container. You can keep your Fruity Pebbles treats fresh at room temperature for about 3 to 4 days. If you need to store them for longer, these bars freeze beautifully! Wrap them well, first in plastic wrap and then in foil, and they’ll keep in the freezer for up to 3 months. For reheating, simply let frozen treats thaw at room temperature for about 30 minutes, or pop them in a low oven (around 200°F or 95°C) for a few minutes until they’re slightly soft. This storage-related secondary keyword reminds you that proper handling keeps them tasting fresh!
Frequently Asked Questions About Fruity Pebbles Treats
Can I use different cereals for these treats?
While the magic of these treats comes from Fruity Pebbles cereal bars, you can absolutely experiment with other colorful cereals! Other options like Cocoa Pebbles, Cinnamon Toast Crunch, or even classic Rice Krispies can create delicious variations. Just remember that the texture and sweetness might change slightly. For other cereal-based treats, check out our easy recipes.
Why are my Fruity Pebbles Treats so hard?
This usually happens if the marshmallow mixture gets too hot or if you press the cereal mixture into the pan too forcefully. Make sure you melt the marshmallows over medium-low heat and remove them from the heat immediately before stirring in the cereal. When pressing into the pan, use lightly buttered hands or a spatula with water to avoid over-compacting them.
How do I get cleaner cuts on my Fruity Pebbles bars?
For those perfectly neat squares, wait until the treats have cooled and set completely. Lightly buttering or greasing your knife before each cut helps a lot. You can also try using a pizza cutter for a smoother slice. This ensures your Fruity Pebbles cereal bars look as good as they taste!
Can I add mix-ins to my Fruity Pebbles Treats?
Definitely! Adding mix-ins can take your Fruity Pebbles Treats to the next level. Think mini chocolate chips, sprinkles, or even a drizzle of white chocolate after they’ve set. Just be sure to fold them in gently with the cereal to avoid breaking the cereal pieces.
Variations of Fruity Pebbles Treats You Can Try
While the classic Fruity Pebbles Treats are undeniably amazing, don’t be afraid to get creative! These Fruity Pebbles treat variations can add a whole new dimension to this beloved dessert. Think beyond the basic recipe to truly make these bars your own.
- Dietary Tweaks: For a gluten-free option, simply swap out the Fruity Pebbles cereal for a certified gluten-free brand. You can also explore vegan marshmallows and butter substitutes to make these treats suitable for a wider audience.
- Flavor Boosts: Elevate the taste by adding a teaspoon of vanilla extract to the melted marshmallow mixture, or swirl in some white chocolate or cream cheese frosting once the bars are pressed into the pan. A pinch of salt can also enhance the sweetness.
- Themed Creations: Get festive by adding sprinkles that match a holiday or party theme. For a summer treat, consider adding a touch of coconut extract for a tropical vibe.
- Texture Play: Mix in a handful of mini chocolate chips or even some chopped nuts along with the cereal for an added crunch and flavor contrast.

Fruity Pebbles Treats Delightful: 1 Amazing Recipe
- Total Time: 45 minutes
- Yield: 12 servings 1x
- Diet: Vegetarian
Description
Create delightful Fruity Pebbles Treats with this easy recipe. These colorful, no-bake bars are a fun and quick dessert perfect for kids and adults, bringing a taste of childhood nostalgia.
Ingredients
- 7 tablespoons butter
- 10 ounces miniature marshmallows
- 8 cups Fruity Pebbles cereal
Instructions
- Prepare a 9×13 pan by rubbing the bottom and sides with butter. Set aside.
- Melt butter in a large pan over medium heat. Add marshmallows, stirring until melted.
- Remove the pan from the heat and immediately pour the cereal into the pan on top of the melted marshmallows. Stir quickly until well combined.
- Pour the mixture into the prepared pan. Dampen your fingers with cool water and use them to spread the mixture evenly, packing it down firmly.
- Let the treats sit for at least 30 minutes before cutting into squares.
Notes
- Pack the mixture firmly in the pan for best results.
- Using cool water on your fingers prevents the mixture from sticking while spreading.
- Store leftovers in an airtight container to maintain freshness.
- Prep Time: 10 minutes
- Cook Time: 5 minutes
- Category: Dessert
- Method: Stovetop
- Cuisine: American
Nutrition
- Serving Size: 1 square
- Calories: 120
- Sugar: 10g
- Sodium: 50mg
- Fat: 4g
- Saturated Fat: 2.5g
- Unsaturated Fat: 1g
- Trans Fat: 0g
- Carbohydrates: 19g
- Fiber: 0g
- Protein: 1g
- Cholesterol: 10mg