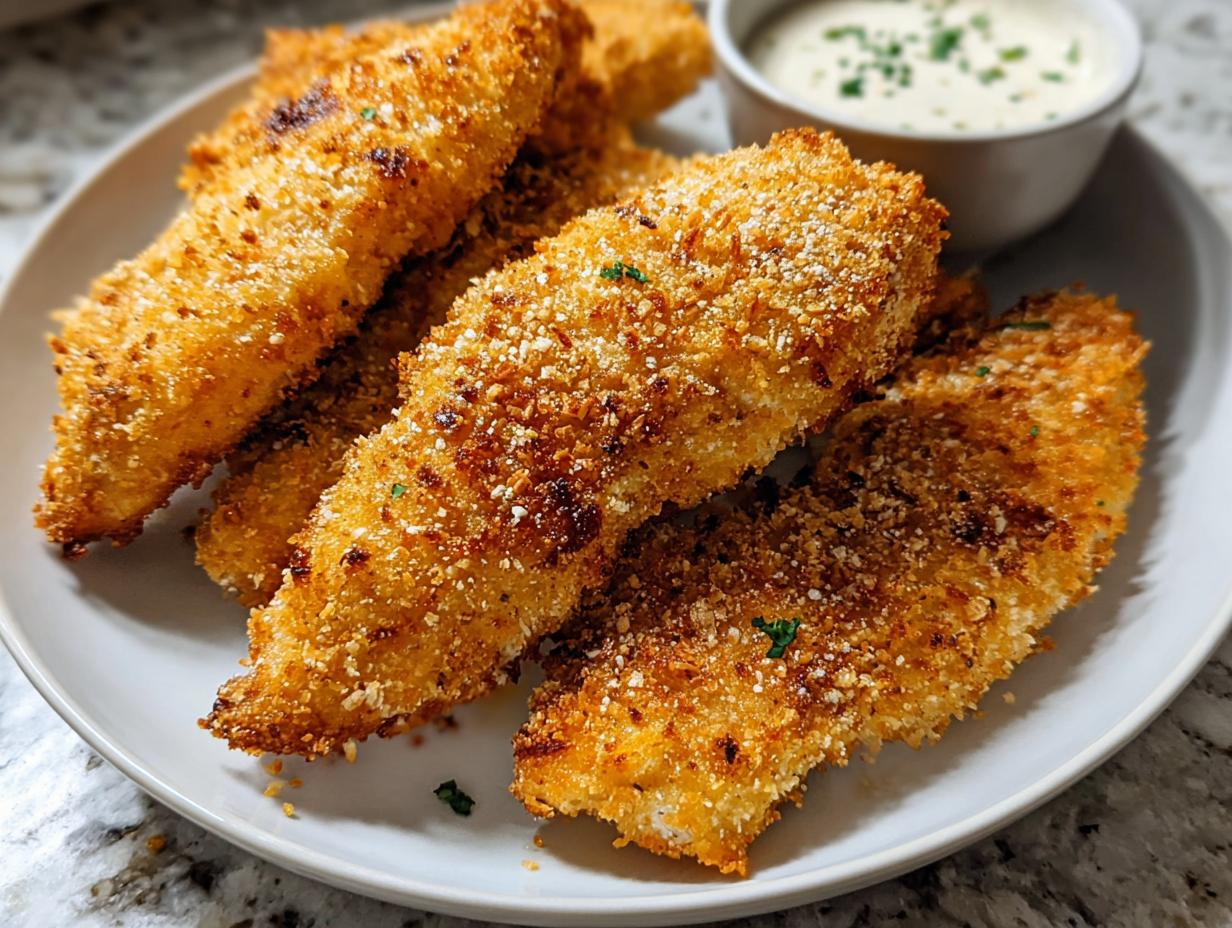
Chicken tenders have a special place in my heart, reminding me of cozy family dinners and happy childhood memories. The aroma of perfectly seasoned chicken baking in the oven always brings a smile to my face. I remember my mom making these crispy chicken strips for us, and the crunch was always so satisfying! Learning how to make chicken tenders from scratch has been a game-changer, offering a delicious and healthier alternative to takeout. Let’s get cooking!
Why You’ll Love This Homemade Chicken Tenders Recipe
You’re going to adore making these homemade chicken tenders. They’re a weeknight winner for so many reasons:
- Incredible taste: Perfectly seasoned and baked to golden perfection.
- Super speedy prep: Get dinner on the table in under an hour.
- Healthier option: A delicious alternative to fried fast food.
- Budget-friendly: Uses simple, affordable ingredients.
- Family-favorite: Guaranteed to please even the pickiest eaters!
- So easy to make: These are truly easy chicken tenders.
- Versatile: Great with any of your favorite dipping sauces.
- Crispy perfection: Achieve that satisfying crunch every time.
Ingredients for Crispy Chicken Strips
Here’s what you’ll need to create these fantastic breaded chicken tenders. Having everything prepped makes the process so smooth! I always like to have my ingredients ready before I start coating the chicken.
- 1.5 lbs boneless, skinless chicken tenderloins – these are naturally tender and cook quickly
- 1 cup all-purpose flour – this is the base for our coating
- 2 large eggs, beaten – the binder that helps the breadcrumbs stick
- 2 cups breadcrumbs (plain or panko) – panko gives an extra crispy texture!
- 1 teaspoon salt
- 1/2 teaspoon black pepper
- 1/2 teaspoon paprika – for a little color and warmth
- 1/4 teaspoon garlic powder – adds a savory depth
- Non-stick cooking spray – essential for baking
How to Make Oven Baked Chicken Tenders
Making these juicy chicken tenders is a straightforward process that yields incredibly satisfying results. I love that I can get that perfect crisp without all the oil of frying!
- Step 1: Start by preheating your oven to 400°F (200°C). This ensures the tenders cook evenly and get that golden-brown exterior. Grab a baking sheet and line it with parchment paper. Give it a light mist of non-stick cooking spray; this helps prevent any sticking and makes cleanup a breeze.
- Step 2: Set up your dredging station. You’ll need three shallow dishes. In the first, whisk together the 1 cup all-purpose flour, 1 teaspoon salt, 1/2 teaspoon black pepper, 1/2 teaspoon paprika, and 1/4 teaspoon garlic powder. This seasoned flour is the first layer of flavor and helps the egg adhere.
- Step 3: In the second dish, add your 2 large eggs, beaten. This is your binder. Make sure they’re well beaten so they coat the chicken evenly.
- Step 4: In the third dish, place your 2 cups breadcrumbs. Whether you choose plain or panko, make sure they’re ready to go. Panko breadcrumbs will give you that extra crunch that makes these chicken tenders so amazing.
- Step 5: Now for the fun part: coating the chicken! Take one chicken tenderloin at a time and dredge it first in the seasoned flour, shaking off any excess.
- Step 6: Next, dip the floured tenderloin into the beaten eggs, making sure it’s completely coated. Let any excess egg drip off.
- Step 7: Finally, press the egg-coated tenderloin into the breadcrumbs. Gently press to ensure the breadcrumbs stick well, creating a nice, even coating.
- Step 8: Arrange the coated chicken tenders on your prepared baking sheet. Make sure they are in a single layer, not touching, so they can bake properly and get nice and crispy.
- Step 9: Give the tops of the coated chicken tenders a generous spray with non-stick cooking spray. This creates that beautiful golden-brown finish and extra crispiness.
- Step 10: Bake for 20-25 minutes. About halfway through, flip the tenders to ensure they cook evenly on both sides. You’re looking for them to be golden brown and cooked through. The internal temperature should reach 165°F (74°C). These will be wonderfully juicy chicken tenders!
- Step 11: Once they’re perfectly baked, remove them from the oven. Let them cool for just a minute or two before serving. Enjoy your delicious homemade chicken tenders hot with your favorite dipping sauces!

Pro Tips for the Best Chicken Tenders
I’ve learned a few tricks over the years to make sure these chicken tenders turn out perfectly every single time. Follow these tips for the ultimate crispy, juicy results!
- For extra crispy chicken tenders, use panko breadcrumbs. They create a lighter, crunchier coating than regular breadcrumbs.
- Don’t skip the spray! Spraying the tenders with non-stick cooking spray before baking is crucial for achieving that golden-brown, crispy finish.
- Ensure your oven is fully preheated. A hot oven is key to cooking the chicken quickly and getting that satisfying crunch.
- Pat your chicken tenderloins dry before breading. This helps the flour, egg, and breadcrumbs adhere better, preventing a soggy coating.
What’s the secret to perfect chicken tenders?
The secret is a triple coating: flour, egg, then breadcrumbs. For an even better chicken tenderloin recipe, try adding a bit of cornstarch to your flour mixture for extra crispiness. For more baking tips, check out this guide on how to bake chicken tenders.
Can I make chicken tenders ahead of time?
Yes, you can bread them ahead of time! Coat the chicken tenders and place them in a single layer on a baking sheet, then refrigerate them for up to 24 hours before baking. They might need an extra minute or two in the oven.
How do I avoid common mistakes with breaded chicken tenders?
Avoid overcrowding the baking sheet; give each tender space to crisp up. Also, don’t over-handle the breaded tenders, as this can knock off the coating. Ensure the chicken is cooked through to avoid undercooked meat.
Best Ways to Serve Your Chicken Strips Recipe
Once your chicken strips recipe is baked to golden perfection, the fun really begins with how you serve them! I love offering a variety of chicken tender dipping sauces on the side because everyone has their favorite. Think classic honey mustard, tangy BBQ sauce, creamy ranch, or even a spicy sriracha mayo.
These tenders are fantastic on their own as a main course, but they also make a great addition to salads or served alongside classic comfort foods. Imagine them paired with some creamy mashed potatoes, a fresh green salad, or some crispy oven fries. They’re truly a versatile dish that kids and adults alike will gobble up! For more dinner ideas, explore our dinner recipes.
Nutrition Facts for Chicken Tenders
Here’s a breakdown of the estimated nutritional information per serving for these delicious oven baked chicken tenders. It’s always good to know what you’re eating, especially when making healthier choices at home!
- Calories: 350
- Fat: 15g
- Saturated Fat: 3g
- Protein: 25g
- Carbohydrates: 30g
- Fiber: 2g
- Sugar: 2g
- Sodium: 450mg
Nutritional values are estimates and may vary based on specific ingredients used, especially if you opt for different types of breadcrumbs or coatings.
How to Store and Reheat Oven Baked Chicken Tenders
Once your delicious oven baked chicken tenders have cooled completely, storing them properly is key to keeping them tasting great, especially for those kid friendly chicken tenders. I like to let them cool on a wire rack for about 15-20 minutes so they don’t steam in the container. Once cooled, place them in an airtight container or a resealable plastic bag. They’ll stay fresh in the refrigerator for about 3 to 4 days.
If you want to make a larger batch to enjoy later, these tenders freeze wonderfully! Wrap them tightly in plastic wrap, then in aluminum foil, or place them in a freezer-safe bag. They can be stored in the freezer for up to 3 months. To reheat, the best method for maintaining crispiness is in the oven. Place the frozen tenders on a baking sheet and bake at 375°F (190°C) for about 15-20 minutes, or until heated through. You can also reheat them in an air fryer for about 5-8 minutes.
Frequently Asked Questions About Chicken Tenders
What’s the difference between chicken tenders and chicken fingers?
Honestly, the terms “chicken tenders” and “chicken fingers” are used interchangeably by most people! Technically, tenders are the actual strip of muscle found under the breast, while fingers are usually cut from the breast meat. For home cooks, the result is pretty much the same: delicious, bite-sized chicken pieces!
Can I make my chicken tenders gluten-free?
Absolutely! It’s super easy to adapt this recipe to be gluten-free. Just swap out the all-purpose flour for a gluten-free flour blend and use gluten-free breadcrumbs or panko. The process is exactly the same, and you’ll still get wonderfully crispy results, almost like a gluten-free version of a classic fried chicken tenders recipe. For more gluten-free options, check out our gluten-free recipes.
What are the best chicken tender dipping sauces?
Oh, the possibilities are endless! My personal favorites include honey mustard, a spicy sriracha mayo, classic BBQ sauce, and creamy ranch. Ketchup is always a hit with kids, and a tangy blue cheese dressing is great for a more grown-up palate. You really can’t go wrong!
How can I make my chicken tenders extra crispy?
For that ultimate crunch, I highly recommend using panko breadcrumbs. Also, make sure not to overcrowd the baking sheet – give those tenders plenty of space to crisp up. Spraying them generously with non-stick cooking spray before baking is another key step for achieving that golden, crispy exterior, similar to what you’d get from a good fried chicken tenders recipe.
Variations of Chicken Tenders You Can Try
Once you’ve mastered the basic recipe, don’t be afraid to get creative! There are so many fun ways to switch up your homemade chicken tenders. For a tangier flavor profile, try making buttermilk chicken tenders by marinating the chicken in buttermilk for at least 30 minutes before breading. It makes them incredibly tender and adds a subtle depth. You might also enjoy our buttermilk blueberry breakfast cake for a different take on buttermilk goodness.
If you’re looking for a different cooking method, consider air frying! Air fryer chicken tenders cook up with amazing crispiness in about half the time. You can also experiment with different seasonings – smoked paprika, onion powder, or even a pinch of cayenne pepper can give your breaded chicken tenders a whole new personality. Don’t forget about gluten-free options; simply use a gluten-free flour blend and gluten-free breadcrumbs for a delicious alternative.
Print
Crispy Chicken Tenders: 10 Minutes to Perfection
- Total Time: 40 minutes
- Yield: 4-6 servings 1x
- Diet: Vegetarian
Description
Enjoy crispy, juicy, and easy homemade chicken tenders baked to perfection. This recipe offers a healthier alternative to fast food and can be customized for gluten-free diets. Serve with your favorite dipping sauces for a crowd-pleasing meal.
Ingredients
- 1.5 lbs boneless, skinless chicken tenderloins
- 1 cup all-purpose flour
- 2 large eggs, beaten
- 2 cups breadcrumbs (plain or panko)
- 1 teaspoon salt
- 1/2 teaspoon black pepper
- 1/2 teaspoon paprika
- 1/4 teaspoon garlic powder
- Non-stick cooking spray
Instructions
- Preheat your oven to 400°F (200°C). Line a baking sheet with parchment paper and lightly spray with non-stick cooking spray.
- Prepare three shallow dishes. In the first dish, combine flour, salt, pepper, paprika, and garlic powder.
- In the second dish, place the beaten eggs.
- In the third dish, place the breadcrumbs.
- Dredge each chicken tenderloin first in the flour mixture, shaking off any excess.
- Next, dip the floured tenderloin into the beaten eggs, ensuring it’s fully coated.
- Finally, coat the tenderloin with breadcrumbs, pressing gently to adhere.
- Place the coated chicken tenders on the prepared baking sheet in a single layer.
- Spray the tops of the chicken tenders generously with non-stick cooking spray.
- Bake for 20-25 minutes, flipping halfway through, until the chicken tenders are golden brown and cooked through.
- Serve your delicious homemade chicken tenders hot with your favorite dipping sauces.
Notes
- For gluten-free chicken tenders, use gluten-free flour and gluten-free breadcrumbs.
- You can add other seasonings to the flour or breadcrumbs, such as onion powder or cayenne pepper.
- Ensure chicken is cooked to an internal temperature of 165°F (74°C).
- These chicken tenders are great served with honey mustard or BBQ sauce.
- For extra crispy chicken tenders, use panko breadcrumbs.
- Prep Time: 15 minutes
- Cook Time: 25 minutes
- Category: Main Course
- Method: Baking
- Cuisine: American
Nutrition
- Serving Size: 3-4 tenders
- Calories: 350
- Sugar: 2g
- Sodium: 450mg
- Fat: 15g
- Saturated Fat: 3g
- Unsaturated Fat: 12g
- Trans Fat: 0g
- Carbohydrates: 30g
- Fiber: 2g
- Protein: 25g
- Cholesterol: 90mg