Butterfinger Pie has always been my go-to for a guaranteed crowd-pleaser, bringing back childhood memories of candy store runs and sticky fingers. There’s something magical about the way those crunchy, peanut-buttery Butterfinger bars transform into a decadent, creamy filling nestled in a chocolate crust. I’ve discovered that this easy Butterfinger Pie is surprisingly simple to whip up, even on a busy weeknight. If you’ve ever wondered how to make Butterfinger Pie that tastes like pure joy, you’re in the right place. Get ready for a dessert that’s both nostalgic and utterly irresistible. Let’s get cooking!
Why You’ll Love This Butterfinger Pie
This dessert is a winner for so many reasons! Get ready to fall in love with this:
- Incredible Taste: It’s a perfect balance of sweet, salty, and crunchy with that signature Butterfinger flavor you adore.
- Super Quick Prep: With only 15 minutes of active prep, it’s a lifesaver for busy schedules.
- Family Favorite: Kids and adults alike rave about this treat, making it perfect for parties or family nights.
- Budget-Friendly Bliss: Uses common ingredients and a store-bought crust, keeping it affordable.
- Dreamy Texture: The smooth, creamy Butterfinger Pie filling is pure heaven in every bite.
- No-Bake Convenience: No oven required means less fuss and more time enjoying this delicious dessert.
- Visually Appealing: The crushed Butterfinger topping makes it look as good as it tastes.
- Pure Comfort: This creamy Butterfinger Pie offers pure comfort and nostalgia.
Ingredients for Your Homemade Butterfinger Pie
Gathering these simple items is the first step to creating your amazing Butterfinger pie filling. The magic happens when these flavors combine!
- 1 (8-ounce) package cream cheese, room temperature – This is the base for our super creamy filling. Make sure it’s softened so it beats up smoothly!
- 1/2 cup creamy peanut butter – Adds that classic, irresistible peanut butter flavor that pairs so well with Butterfinger.
- 2 teaspoons vanilla extract – Enhances all the other flavors and adds a lovely aroma.
- 1 1/2 cups powdered sugar – Sweetens the filling and gives it that smooth, dreamy texture.
- 1 (12.5-ounce) bag fun-sized Butterfinger bars, crushed (reserve 2 bars for topping) – The star of the show! These crunchy, peanut-buttery candies bring the signature flavor and texture.
- 1 (8-ounce) container Cool Whip, thawed – This makes the pie light, airy, and wonderfully fluffy.
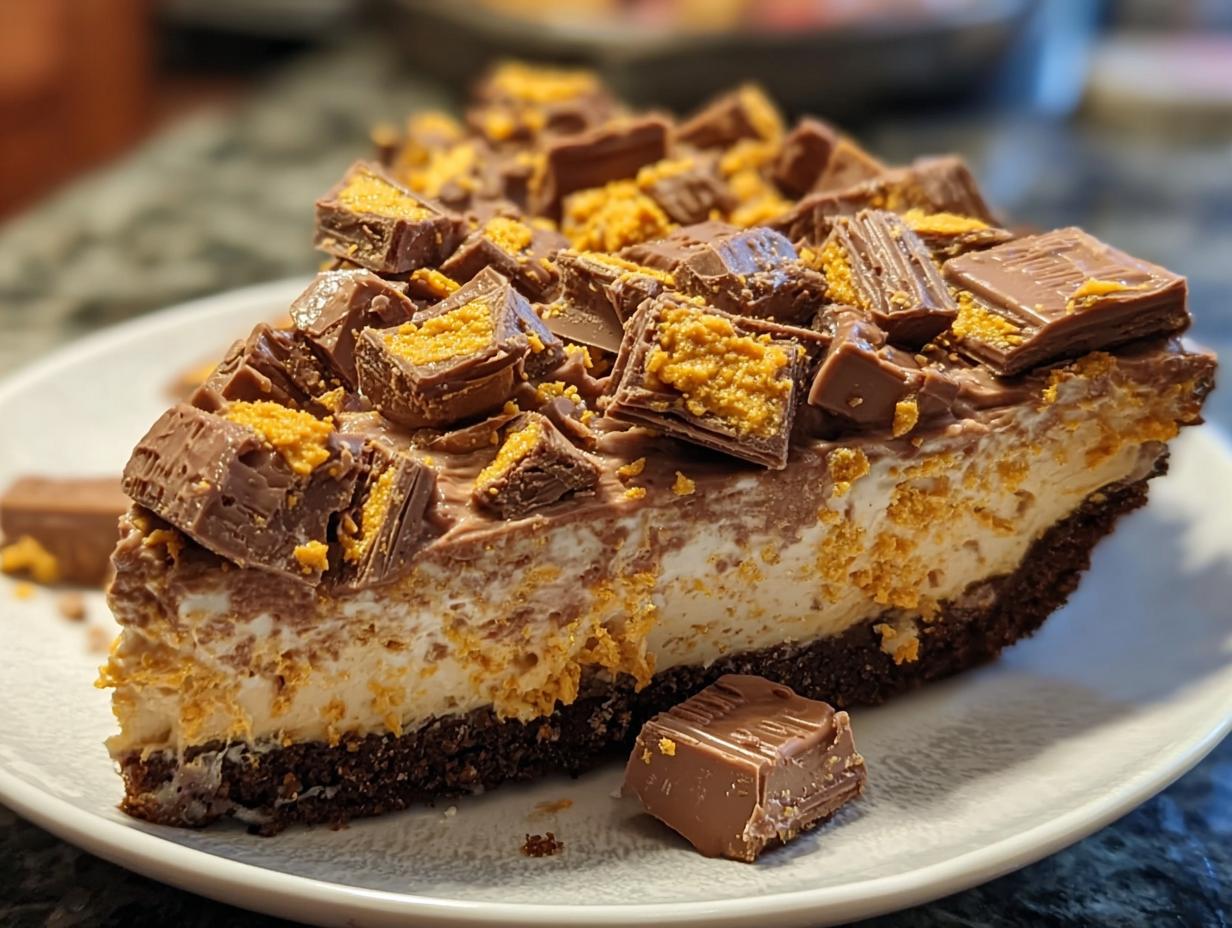
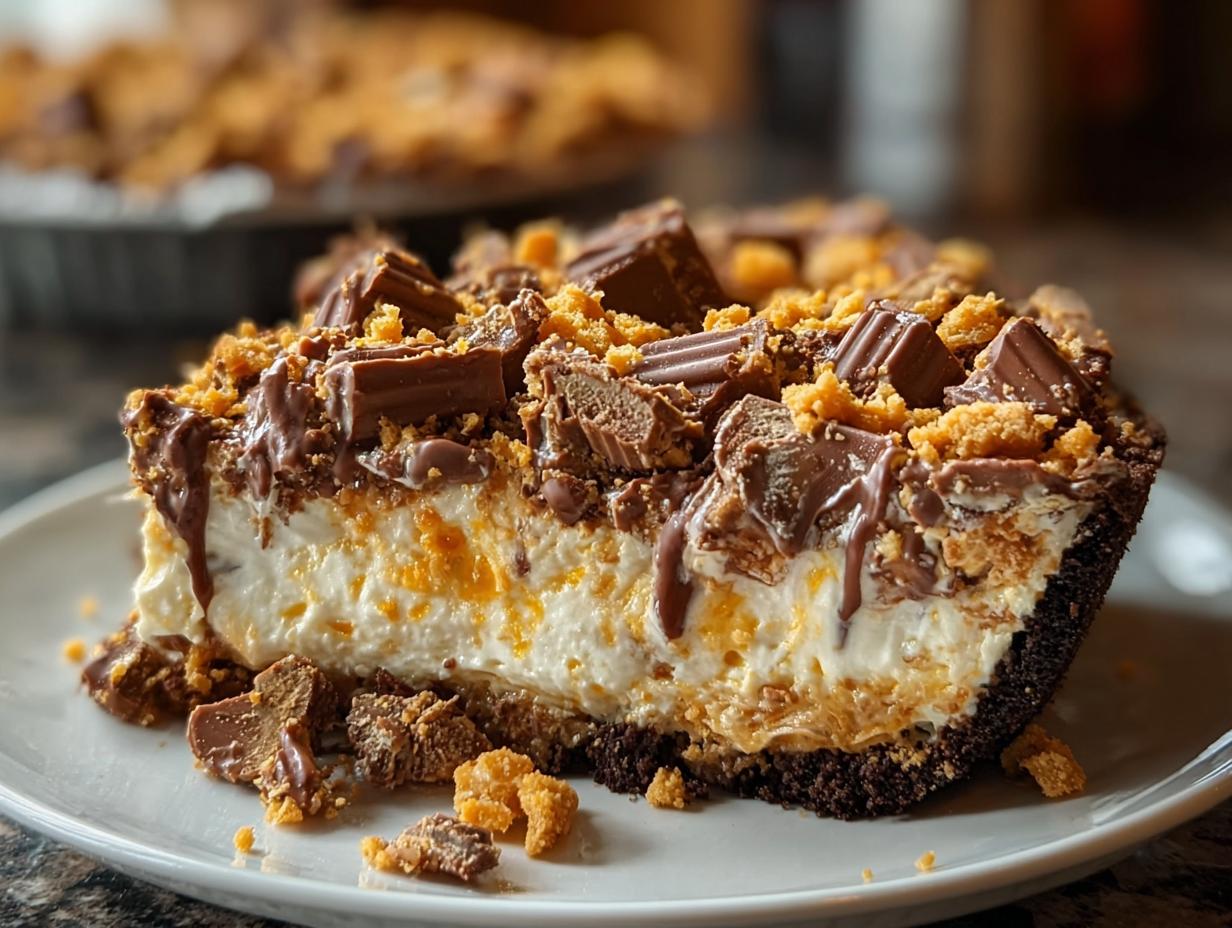
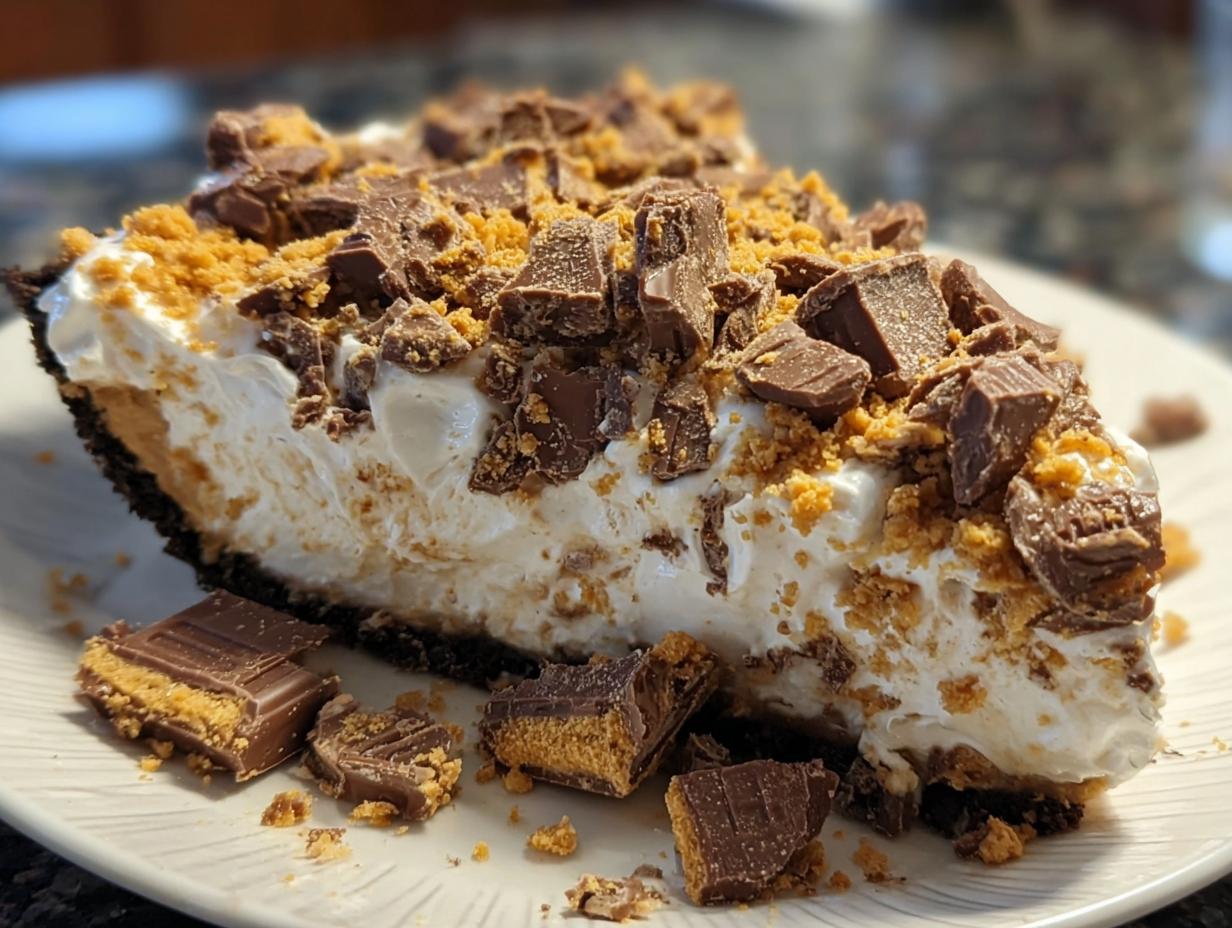
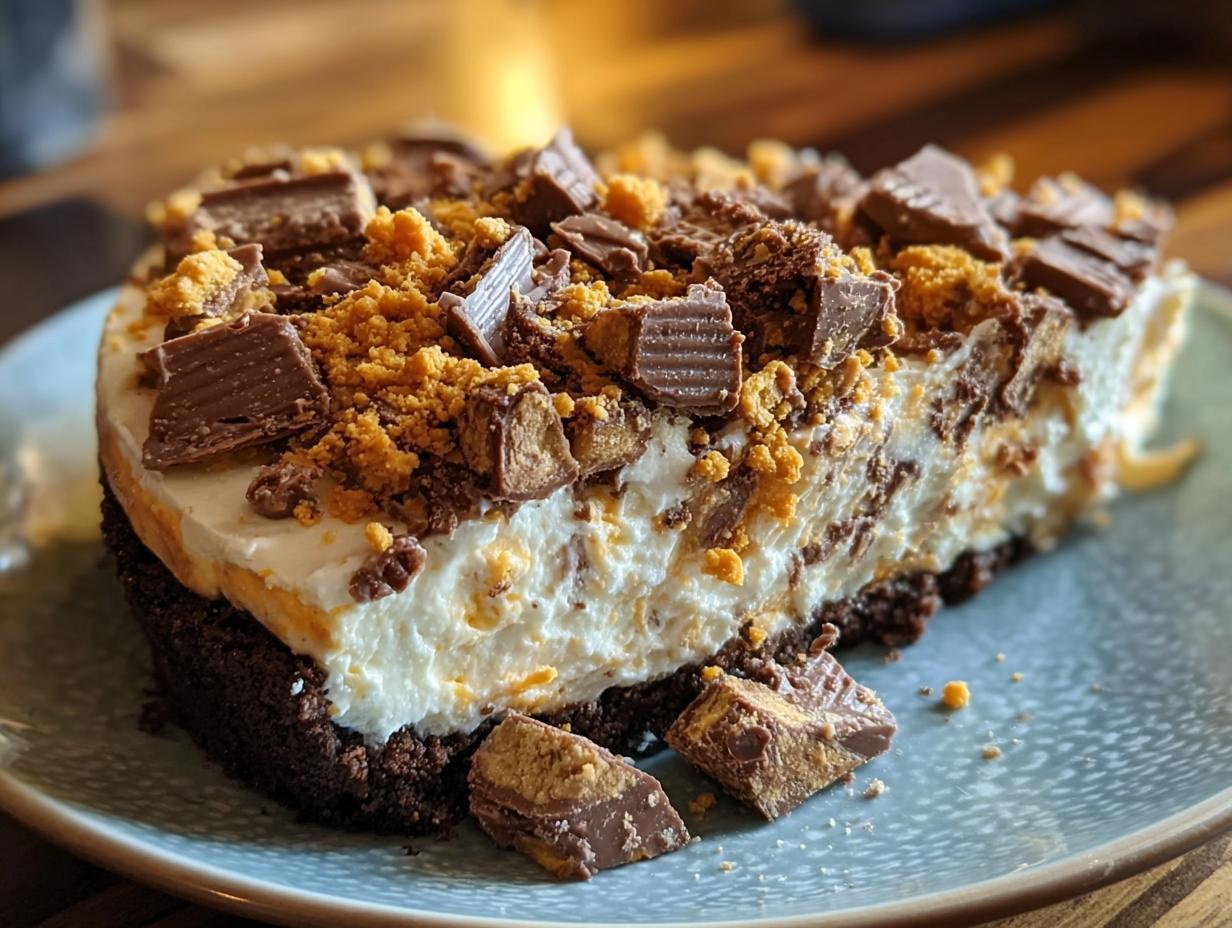
- 1 store-bought Oreo or chocolate graham cracker crust – The perfect chocolatey base; using a pre-made crust makes this a true no bake Butterfinger Pie.
How to Make the Best Butterfinger Pie
- Step 1: Start by beating the room temperature cream cheese and creamy peanut butter in a large mixing bowl until they’re perfectly smooth and creamy. I love using a hand mixer for this as it makes it super easy to get that lump-free base.
- Step 2: Stir in the vanilla extract until it’s all nicely combined. This fragrance is just the beginning of the deliciousness!
- Step 3: Gradually add the powdered sugar, beating until the mixture is smooth and fluffy. It should look like a delightful, sweet cloud ready to go into your no bake Butterfinger Pie.
- Step 4: Now for the fun part! Gently fold in the crushed Butterfinger bars. Make sure to reserve about half a cup for sprinkling on top later – that crunchy topping is key to this amazing Butterfinger pie recipe.
- Step 5: Carefully fold in the thawed Cool Whip. The goal here is to keep the mixture light and airy, which is essential for that melt-in-your-mouth texture in this homemade Butterfinger Pie.
- Step 6: Spoon the luscious filling evenly into your prepared store-bought Oreo or chocolate graham cracker crust. Smooth the top so it’s nice and even for the best presentation of this no bake Butterfinger Pie.
- Step 7: Sprinkle the reserved crushed Butterfinger pieces over the top of the pie. This step really elevates the look and adds that irresistible crunch.
- Step 8: Cover the pie with plastic wrap and refrigerate for at least 4 hours. This chilling time is crucial for the Butterfinger pie filling to set properly, ensuring you get clean slices of this delightful Butterfinger dessert pie. For the absolute best texture, I often let mine chill overnight.
Pro Tips for the Best Butterfinger Pie
Want to elevate your pie game? These little tricks will make your homemade Butterfinger Pie truly unforgettable. Trust me, these tips have saved me from kitchen mishaps more than once!
- Always use fun-sized Butterfinger bars for crushing; they have a slightly different texture that works wonderfully in the filling.
- Ensure your cream cheese is truly at room temperature. Cold cream cheese leads to a lumpy, less smooth filling for your Butterfinger dessert pie.
- Don’t overmix the Cool Whip; fold it in gently to maintain that airy, light texture that makes this pie so irresistible.
- For an extra chocolatey kick, consider using a chocolate graham cracker crust instead of Oreo.
What’s the secret to perfect Butterfinger Pie?
The magic lies in the balance! Using softened cream cheese and creamy peanut butter creates a luscious base, while gently folding in the Cool Whip ensures an airy, melt-in-your-mouth texture for your Butterfinger candy bar pie.
Can I make Butterfinger Pie ahead of time?
Absolutely! This no bake Butterfinger Pie is perfect for making ahead. Prepare it up to 24 hours in advance and keep it covered in the refrigerator until ready to serve. This allows the flavors to meld beautifully.
How do I avoid common mistakes with Butterfinger Pie?
The biggest pitfall is using cold cream cheese, which results in lumps. Also, don’t over-crush your Butterfingers for the topping; a mix of fine crumbs and small chunks adds the best texture to your Butterfinger pie.
Best Ways to Serve Your Delicious Butterfinger Pie
This decadent dessert is already a showstopper on its own, but I love finding ways to make it even more special. For a truly classic pairing, consider serving slices of your Butterfinger Pie alongside a rich, dark chocolate sauce. The deep chocolate flavor complements the peanut butter and Butterfinger crunch beautifully, making it almost like a Chocolate Butterfinger Pie experience. For a lighter touch, a dollop of fresh whipped cream or a scoop of vanilla bean ice cream is always a winner. You could even add a sprinkle of flaky sea salt on top to enhance those sweet and salty notes!
Nutrition Facts for Butterfinger Pie
When you’re enjoying a slice of this delightful dessert, here’s a breakdown of what you’re getting. It’s a treat, for sure!
- Calories: 420 kcal
- Fat: 32 g
- Saturated Fat: 15 g
- Protein: 8 g
- Carbohydrates: 48 g
- Fiber: 2 g
- Sugar: 35 g
- Sodium: 250 mg
Nutritional values are estimates and may vary based on specific ingredients used in your Butterfinger Pie.
How to Store and Reheat Your Butterfinger Pie
Once your delicious Butterfinger dessert pie has had a chance to chill and set, you’ll want to know the best ways to keep it fresh. After it’s completely cooled, transfer the pie to an airtight container. This is crucial for maintaining its texture and preventing any unwanted odors from the refrigerator from seeping in. Store your pie in the fridge for up to 3 to 4 days. If you find yourself with extra pie (which is rare, I know!), you can freeze it. Wrap individual slices tightly in plastic wrap, then in foil, and freeze for up to 3 months. To reheat, simply thaw frozen slices in the refrigerator overnight before serving.
Frequently Asked Questions About Butterfinger Pie
What’s the best way to crush Butterfinger bars for the pie?
For the perfect texture in your Butterfinger Pie, I recommend crushing the fun-sized bars inside their wrappers. This prevents them from becoming too fine a powder and ensures you get those delightful crunchy bits throughout the filling and topping. You can use a rolling pin or even the flat side of a meat mallet. This simple step makes a big difference in the final Butterfinger dessert recipe.
Can I make a gluten-free Butterfinger Pie?
Yes, you absolutely can! To adapt this Butterfinger Pie recipe for a gluten-free diet, simply use a gluten-free chocolate cookie crust or a nut-based crust. Ensure the Butterfinger bars you use are gluten-free as well, as some candies can contain hidden gluten. This makes it a wonderfully inclusive treat for everyone to enjoy.
What other candies can I use in this pie?
While the Butterfinger flavor is classic, this recipe is quite forgiving! You could try using chopped Snickers, Reese’s Peanut Butter Cups, or even Heath bars for a different twist on this Butterfinger dessert recipe. Each variation will offer a unique flavor profile, but the creamy peanut butter filling will still shine through beautifully.
Why is my Butterfinger Pie not setting?
The most common reason a no bake Butterfinger Pie doesn’t set is insufficient chilling time. Make sure you refrigerate it for at least 4 hours, or preferably overnight. Also, ensure you didn’t overmix the Cool Whip into the filling, as this can make it too airy and prevent it from firming up properly. Proper chilling is key to achieving that perfect sliceable texture for your Butterfinger Pie.
Variations of Butterfinger Pie You Can Try
While this classic Butterfinger Pie recipe is incredible as is, I love experimenting with different twists! If you’re looking for a refreshing summer treat, try turning this into a Butterfinger ice cream pie. Simply use a softened vanilla or chocolate ice cream mixed with the crushed Butterfinger pieces and Cool Whip, then pour into your crust and freeze until firm. For a healthier spin, opt for a crust made from dates and nuts, and use a Greek yogurt-based filling instead of cream cheese and Cool Whip. You could also create a decadent Chocolate Butterfinger Pie by adding melted chocolate to the filling or using a chocolate crust and chocolate pudding mix.

Amazing Butterfinger Pie Recipe
- Total Time: 4 hours 15 minutes
- Yield: 8 servings 1x
- Diet: Vegetarian
Description
A dreamy no-bake dessert featuring a creamy peanut butter filling, crunchy Butterfinger pieces, and a chocolatey crust. This easy Butterfinger Pie is perfect for any occasion.
Ingredients
- 1 (8-ounce) package cream cheese, room temperature
- 1/2 cup creamy peanut butter
- 2 teaspoons vanilla extract
- 1 1/2 cups powdered sugar
- 1 (12.5-ounce) bag fun-sized Butterfinger bars, crushed (reserve 2 bars for topping)
- 1 (8-ounce) container Cool Whip, thawed
- 1 store-bought Oreo or chocolate graham cracker crust
Instructions
- In a large mixing bowl, beat cream cheese and peanut butter until smooth and creamy.
- Add in vanilla extract and continue mixing until well combined.
- Gradually add powdered sugar, beating until smooth and fluffy.
- Gently fold in the crushed Butterfinger bars, saving some for topping.
- Fold in the thawed Cool Whip carefully to keep the mixture light and airy.
- Spread the filling evenly into the prepared crust, then sprinkle with the reserved Butterfinger crumbs.
- Cover and refrigerate for at least 4 hours, or until set.
Notes
- For best results, chill overnight.
- Store leftovers covered in the refrigerator for up to 4 days.
- Can be frozen for up to 1 month; thaw in the refrigerator before serving.
- Prep Time: 15 minutes
- Cook Time: 0 minutes
- Category: Dessert
- Method: No-bake
- Cuisine: American
Nutrition
- Serving Size: 1 slice (1/8th of pie)
- Calories: 420 kcal
- Sugar: 35 g
- Sodium: 250 mg
- Fat: 32 g
- Saturated Fat: 15 g
- Unsaturated Fat: 17 g
- Trans Fat: 0.5 g
- Carbohydrates: 48 g
- Fiber: 2 g
- Protein: 8 g
- Cholesterol: 50 mg