Danish Butter Cookies have been a beloved treat for generations, known for their buttery, crisp texture and delightful flavor. These cookies are perfect for any occasion, whether enjoyed with a cup of coffee or shared as a gift. With the option to dip them in chocolate, they become even more decadent. Follow this classic and easy recipe to bring a taste of Denmark into your kitchen.

Why You’ll Love This Danish Butter Cookies
These Danish cookies are not just delicious; they are also incredibly versatile. Here’s why you’ll adore making them:
- They are quick to prepare, taking only 40 minutes from start to finish.
- With a few simple ingredients, you can create a bakery-quality treat at home.
- They make perfect gifts, especially when packaged beautifully.
- The buttery flavor melts in your mouth, making every bite irresistible.
- These cookies are suitable for vegetarians, catering to a wide range of dietary preferences.
- You can easily customize them by adding chocolate or sprinkles for a festive touch.
- They are a classic representation of traditional Danish cookies, showcasing Nordic baking techniques.
- They pair wonderfully with tea or coffee, making them ideal for gatherings.
Ingredients for Danish Butter Cookies
Gather these items:
- 255 g unsalted butter, softened
- 30 g powdered sugar
- 1 teaspoon vanilla extract
- 160 g all-purpose flour
- 8 g cornstarch
- 1-2 teaspoons heavy cream, as needed
- 170 g dark chocolate chips or chocolate almond bark, melted (optional)
- 170 g white chocolate chips or white almond bark, melted (optional)
- Candied sprinkles (optional)
How to Make Danish Butter Cookies Step-by-Step
- Step 1: Line a baking sheet with parchment paper to prevent sticking.
- Step 2: In a medium bowl, beat softened butter for 2-3 minutes until pale and creamy. Add powdered sugar and continue mixing for another 2 minutes until light and fluffy. Incorporate vanilla extract and mix thoroughly.
- Step 3: Add all-purpose flour and cornstarch to the butter mixture. Mix just until the flour is incorporated and a soft dough forms.
- Step 4: Transfer dough to a piping bag fitted with a large open star tip. Test the consistency; if the dough is too stiff, return to the bowl and mix in 1–2 teaspoons of heavy cream to achieve proper piping texture. Pipe desired shapes onto the prepared baking sheet.
- Step 5: Chill piped cookies in the refrigerator for 30 minutes. Meanwhile, preheat the oven to 175°C (350°F).
- Step 6: Bake cookies for 8–10 minutes until edges are lightly golden. Avoid browning the tops to preserve classic appearance. Allow cookies to cool completely on a rack.
- Step 7: If desired, melt chocolate or almond bark in a microwave-safe bowl, heating in 20-second intervals and stirring until smooth. Avoid overheating to prevent seizing.
- Step 8: Dip cooled cookies halfway in melted chocolate, then place on a parchment-lined tray. Decorate with candied sprinkles before chocolate sets. Let set until firm before serving.

Pro Tips for the Perfect Danish Butter Cookies
Keep these in mind:
- Chilling the cookies helps them maintain shape during baking.
- Use a piping bag for more decorative shapes.
- Store cookies in an airtight container to keep them fresh.
- For a gluten-free option, substitute all-purpose flour with a gluten-free blend.
Best Ways to Serve Danish Butter Cookies
These cookies are versatile and can be served in various delightful ways:
- Pair them with your favorite tea or coffee for a cozy afternoon treat.
- Serve alongside a selection of other butter cookies for a delightful dessert platter.
- Wrap them in decorative boxes as thoughtful Danish butter cookie gift ideas for friends and family.
How to Store and Reheat Danish Butter Cookies
To keep your cookies fresh, store them in an airtight container at room temperature. These cookies can last up to a week. If you want to meal prep, you can freeze the dough for up to a month before baking. This allows you to enjoy freshly baked cookies any time!
Frequently Asked Questions About Danish Butter Cookies
What’s the secret to perfect Danish Butter Cookies?
The secret lies in the butter-to-flour ratio and ensuring your butter is softened but not melted. This helps achieve the perfect crumbly yet tender texture.
Can I make Danish Butter Cookies ahead of time?
Yes! You can prepare the dough in advance and refrigerate or freeze it. This way, you can bake fresh cookies whenever you desire.
How do I avoid common mistakes with Danish Butter Cookies?
Ensure your butter is at room temperature for easy mixing, and don’t overmix the dough to keep the cookies tender. Also, avoid overbaking to keep them soft.
Variations of Danish Butter Cookies You Can Try
Get creative with these variations:
- Add lemon zest to the dough for a refreshing citrus flavor.
- Incorporate nuts or dried fruits for added texture and taste.
- Make gluten-free Danish butter cookies by substituting flour with a gluten-free blend.
- Experiment with different chocolate types for dipping, such as milk or white chocolate.

For more delicious recipes, check out our Pumpkin Pecan Cobbler or Perfect Pumpkin Spice Cookies.
Print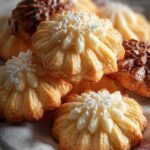
Classic Danish Butter Cookies Recipe That Melt in Your Mouth
- Total Time: 40 minutes
- Yield: 24 cookies 1x
- Diet: Vegetarian
Description
A classic and easy recipe for Danish Butter Cookies that are buttery, crisp, and perfect for any occasion. Optional chocolate dipping for added decadence.
Ingredients
- 255 g unsalted butter, softened
- 30 g powdered sugar
- 1 teaspoon vanilla extract
- 160 g all-purpose flour
- 8 g cornstarch
- 1–2 teaspoons heavy cream, as needed
- 170 g dark chocolate chips or chocolate almond bark, melted (optional)
- 170 g white chocolate chips or white almond bark, melted (optional)
- Candied sprinkles (optional)
Instructions
- Line a baking sheet with parchment paper to prevent sticking.
- In a medium bowl, beat softened butter for 2-3 minutes until pale and creamy. Add powdered sugar and continue mixing for another 2 minutes until light and fluffy. Incorporate vanilla extract and mix thoroughly.
- Add all-purpose flour and cornstarch to the butter mixture. Mix just until the flour is incorporated and a soft dough forms.
- Transfer dough to a piping bag fitted with a large open star tip. Test the consistency; if the dough is too stiff, return to bowl and mix in 1–2 teaspoons of heavy cream to achieve proper piping texture. Pipe desired shapes onto the prepared baking sheet.
- Chill piped cookies in the refrigerator for 30 minutes. Meanwhile, preheat the oven to 175°C (350°F).
- Bake cookies for 8–10 minutes until edges are lightly golden. Avoid browning the tops to preserve classic appearance. Allow cookies to cool completely on a rack.
- If desired, melt chocolate or almond bark in a microwave-safe bowl, heating in 20-second intervals and stirring until smooth. Avoid overheating to prevent seizing.
- Dip cooled cookies halfway in melted chocolate, then place on parchment-lined tray. Decorate with candied sprinkles before chocolate sets. Let set until firm before serving.
Notes
- Chilling the cookies helps them maintain shape during baking.
- Use a piping bag for more decorative shapes.
- Store cookies in an airtight container.
- Prep Time: 10 minutes
- Cook Time: 30 minutes
- Category: Dessert
- Method: Baking
- Cuisine: Danish
Nutrition
- Serving Size: 1 cookie
- Calories: 120
- Sugar: 2g
- Sodium: 50mg
- Fat: 8g
- Saturated Fat: 5g
- Unsaturated Fat: 2g
- Trans Fat: 0g
- Carbohydrates: 12g
- Fiber: 0g
- Protein: 1g
- Cholesterol: 30mg