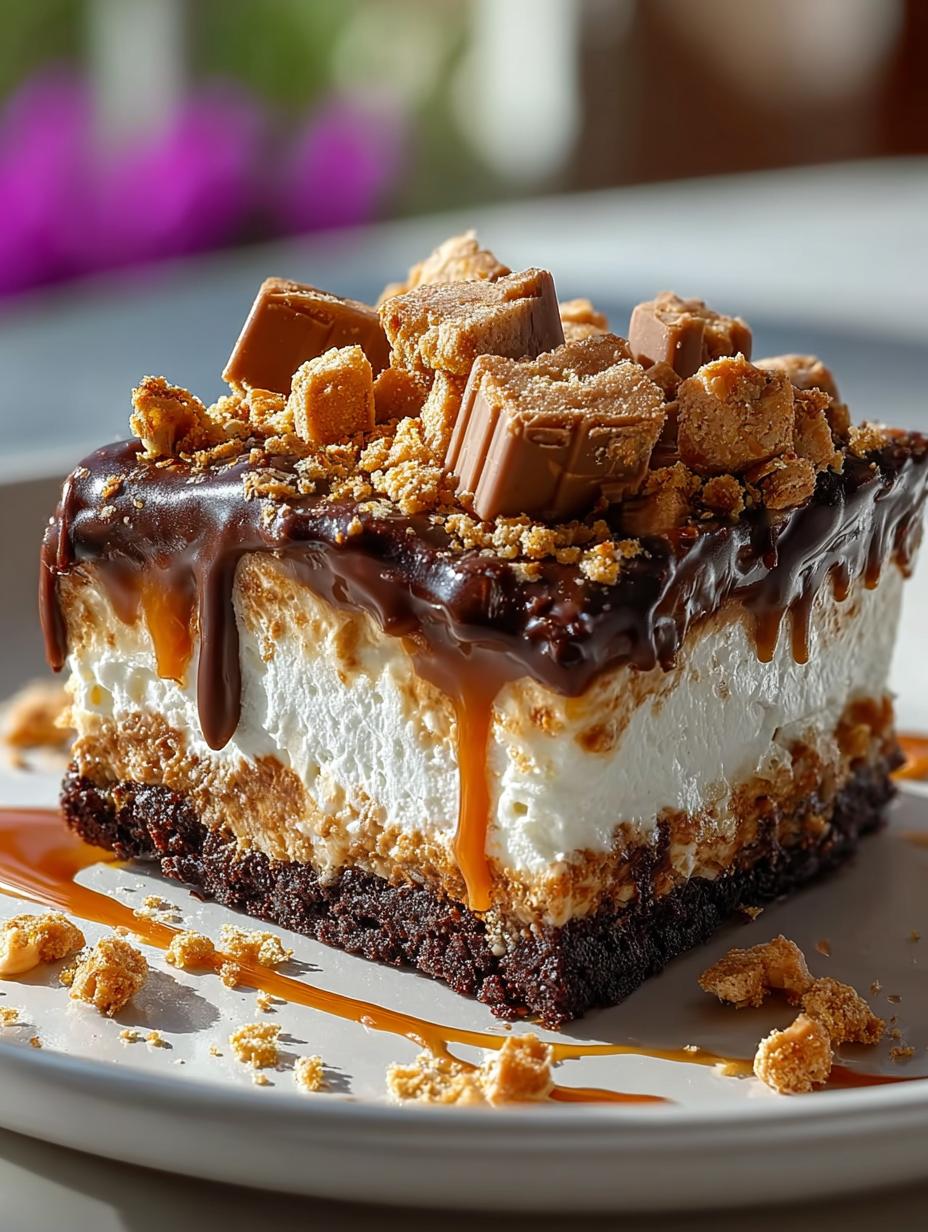
Butterfinger Candy Bar Poke is a sweet, decadent, and oh-so-delicious dessert that combines creamy peanut butter, moist cake layers, and that irresistible Butterfinger crunch. Whether it’s for a birthday party, potluck, or just a cozy night at home, this cake hits all the right notes. The combination of flavors and textures makes it a crowd-pleaser that everyone will adore. Let’s dive into this delightful treat!
Why You’ll Love This Butterfinger Candy Bar Poke
There are countless reasons to adore this Butterfinger Candy Bar Poke cake. First, it’s incredibly easy to make, even if you’re not an experienced baker. Second, the layers of cake and creamy peanut butter mixture create a delightful contrast that melts in your mouth. Third, it’s perfect for parties and gatherings, providing a unique twist on traditional desserts. Fourth, the addition of crushed Butterfinger bars gives it that signature crunch. Fifth, it’s versatile enough to be transformed into a Butterfinger pudding poke cake or a Chocolate Butterfinger poke cake. Lastly, it’s a guaranteed hit that will leave everyone asking for seconds!
Ingredients for Butterfinger Candy Bar Poke
Gather these items:
- 1 box yellow cake mix
- 3 large eggs
- 1 cup water
- 1/3 cup vegetable oil
- 1 (14 oz) can sweetened condensed milk
- 1 cup creamy peanut butter
- 1 cup whipped topping (e.g., Cool Whip)
- 1 cup crushed Butterfinger candy bars
- 1/2 cup chocolate fudge sauce
- Optional: extra Butterfinger pieces for garnish
How to Make Butterfinger Candy Bar Poke Step-by-Step
- Step 1: Preheat oven to 350°F (175°C). Grease and flour a 9×13-inch baking dish.
- Step 2: In a bowl, mix cake mix, eggs, water, and oil. Beat for 2 minutes on medium speed until smooth. Pour into the prepared dish and bake for 25–30 minutes, or until a toothpick inserted in the center comes out clean.
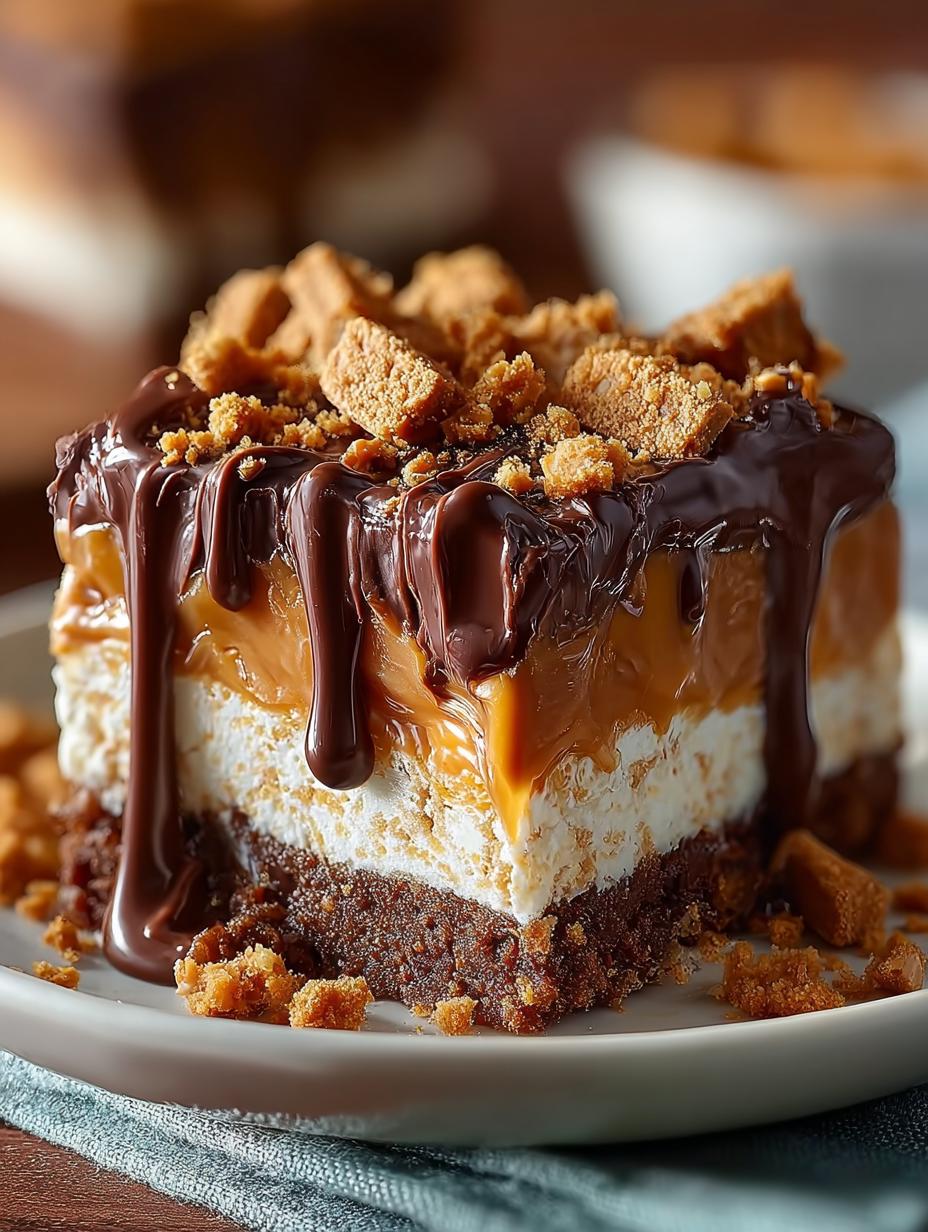
- Step 3: Let the cake cool for 15 minutes. Poke holes all over the surface with the handle of a wooden spoon or a fork. Mix the sweetened condensed milk with peanut butter, then pour evenly over the warm cake so it seeps into the holes.
- Step 4: Allow the cake to cool completely. Spread whipped topping evenly over the top, drizzle with chocolate fudge sauce, and sprinkle crushed Butterfinger candy bars.
- Step 5: Garnish with extra Butterfinger pieces if desired. Refrigerate for at least 2 hours before serving for best flavor and texture.
Pro Tips for the Perfect Butterfinger Candy Bar Poke
Keep these in mind:
- Make sure the cake is completely cooled before adding the peanut butter mixture to prevent it from melting.
- For an extra chocolatey experience, consider using a Butterfinger poke cake with chocolate by adding chocolate cake mix or chocolate chips.
- Don’t skip the refrigeration step; chilling enhances the flavors and improves the texture.
Best Ways to Serve Butterfinger Candy Bar Poke
This amazing cake can be served in various ways. First, consider serving it with a scoop of vanilla ice cream to balance the sweetness. Second, you can sprinkle some extra crushed Butterfinger bars on top right before serving for an added crunch. Lastly, this cake makes a delightful presentation at parties, standing out among other Butterfinger candy bar dessert recipes.
How to Store and Reheat Butterfinger Candy Bar Poke
To store your cake, cover it tightly with plastic wrap or aluminum foil and refrigerate. It can last for up to 4-5 days in the fridge. If you want to make it ahead of time, you can prepare the cake and the peanut butter mixture and assemble it the night before. Just remember to chill it for at least 2 hours before serving.
Frequently Asked Questions About Butterfinger Candy Bar Poke
What is a Butterfinger poke cake?
A Butterfinger poke cake is a moist cake filled with creamy mixtures and topped with crushed Butterfinger candy bars. The cake is “punched” with holes, allowing the delicious flavors to seep in.
Can I make Butterfinger Candy Bar Poke ahead of time?
Yes, you can prepare this cake ahead of time. Just ensure that it is refrigerated for at least 2 hours before serving to allow the flavors to meld.
How do I avoid common mistakes with Butterfinger Candy Bar Poke?
To avoid mistakes, ensure the cake is completely cooled before poking holes and adding the filling. Also, be cautious not to overbake the cake, as it could become dry.
Variations of Butterfinger Candy Bar Poke You Can Try
If you’re feeling adventurous, consider these variations: try a Butterfinger pudding poke cake by adding pudding layers, or create a no-bake version using crushed cookies as a base. You can also play with flavors by infusing the cake with caramel or even making a Butterfinger infused poke cake that incorporates the candy into the batter itself.

For more delicious dessert ideas, check out our Irresistible Peach Upside Down Mini Cakes or try making Pumpkin Pecan Cobbler. You can also explore 2-Ingredient Reese’s Brownies for a quick treat!
Print
Butterfinger Candy Bar Poke Cake: 5 Irresistible Layers
- Total Time: 2 hours 50 minutes
- Yield: 12 servings 1x
- Diet: Vegetarian
Description
Butterfinger Candy Bar Poke Cake – Sweet, Decadent, and Oh-So-Delicious! A dreamy dessert that combines peanut butter creaminess, moist cake layers, and that irresistible Butterfinger crunch. Perfect for birthdays, potlucks, or those nights when you crave something truly indulgent.
Ingredients
- 1 box yellow cake mix
- 3 large eggs
- 1 cup water
- 1/3 cup vegetable oil
- 1 (14 oz) can sweetened condensed milk
- 1 cup creamy peanut butter
- 1 cup whipped topping (e.g., Cool Whip)
- 1 cup crushed Butterfinger candy bars
- 1/2 cup chocolate fudge sauce
- Optional: extra Butterfinger pieces for garnish
Instructions
- Preheat oven to 350°F (175°C). Grease and flour a 9×13-inch baking dish.
- In a bowl, mix cake mix, eggs, water, and oil. Beat for 2 minutes on medium speed until smooth. Pour into the prepared dish and bake for 25–30 minutes, or until a toothpick inserted in the center comes out clean.
- Let the cake cool for 15 minutes. Poke holes all over the surface with the handle of a wooden spoon or a fork. Mix the sweetened condensed milk with peanut butter, then pour evenly over the warm cake so it seeps into the holes.
- Allow the cake to cool completely. Spread whipped topping evenly over the top, drizzle with chocolate fudge sauce, and sprinkle crushed Butterfinger candy bars.
- Garnish with extra Butterfinger pieces if desired. Refrigerate for at least 2 hours before serving for best flavor and texture.
Notes
- Prep Time: 30 minutes
- Cook Time: 30 minutes
- Category: Dessert
- Method: Baking
- Cuisine: American
Nutrition
- Serving Size: 1 slice
- Calories: 320
- Sugar: 25g
- Sodium: 180mg
- Fat: 15g
- Saturated Fat: 4g
- Unsaturated Fat: 10g
- Trans Fat: 0g
- Carbohydrates: 40g
- Fiber: 1g
- Protein: 5g
- Cholesterol: 40mg