Crostini has been a revelation in my kitchen, transforming simple meals into something special with minimal effort. I still remember the first time I tasted these crispy little toasts at a friend’s Italian-themed party. The crunch, the subtle garlic aroma, and how they perfectly cradled a dollop of fresh bruschetta – it was love at first bite! Ever since that day, I’ve been making my own, and I’ve discovered that these easy crostini appetizers are incredibly versatile and always impress. They’re perfect for impromptu gatherings or just elevating a weeknight soup. Making your own toasted bread slices for appetizers from scratch is surprisingly simple. Let’s get cooking!

Why You’ll Love This Homemade Crostini
I genuinely believe you’ll adore making your own crostini for so many reasons. It’s a game-changer for entertaining and everyday snacking alike. Here’s why I think you’ll be adding this recipe to your regular rotation:
- These delightful bites offer an incredible crunch and a savory taste that makes them irresistible.
- The prep time is minimal, allowing you to whip up a batch in under 20 minutes from start to finish.
- They’re a healthier alternative to many fried appetizers, especially when using quality olive oil.
- Homemade crostini is incredibly budget-friendly, turning an inexpensive baguette into a gourmet base.
- They’re a fantastic option for quick crostini snacks, perfect for those unexpected hunger pangs.
- Everyone, from kids to adults, loves these crispy bread slices, making them truly family-friendly.
- You can easily customize them, making them ideal for quick crostini snacks with whatever you have on hand.
Ingredients for Perfect Crostini
Gathering the right ingredients is the first step to creating these delightful crispy bites. You’ll be surprised how simple it is to transform basic pantry staples into gourmet-level appetizers. Here’s what I use for my go-to crostini recipe:
- 1 baguette – sliced into 1/2-inch rounds. This is essentially what is crostini bread, a narrow, crusty loaf that bakes up perfectly.
- 2 tablespoons olive oil – a good quality extra virgin olive oil adds rich flavor and helps achieve that golden crispness.
- 1 clove garlic, minced – fresh garlic is non-negotiable here; it infuses the oil beautifully.
- Pinch of salt – just enough to enhance all the flavors without overpowering them.
- Pinch of black pepper – freshly ground pepper adds a subtle warmth.
These simple components come together to create the ideal base for any of your favorite toppings.
How to Make Crostini
Making your own crostini is incredibly straightforward, and I promise, once you try it, you’ll never go back to store-bought. Follow these simple baked crostini instructions, and you’ll have perfectly crisp bread slices ready for any occasion. The aroma alone as they bake is enough to get your taste buds excited!
- Step 1: Begin by preheating your oven to 375°F (190°C). This ensures the oven is at the optimal temperature for even baking, giving your bread slices that beautiful golden-brown finish.
- Step 2: Arrange your baguette slices in a single layer on a baking sheet. I like to use a large sheet to give them plenty of space, ensuring each piece bakes evenly and gets wonderfully crisp.
- Step 3: In a small bowl, combine the two tablespoons of olive oil, the minced garlic, a pinch of salt, and a pinch of black pepper. Mix these ingredients well. This fragrant oil mixture is key to infusing flavor into your crostini.
- Step 4: Using a pastry brush, gently brush each side of the crostini bread slices with the olive oil mixture. Make sure to get a good, even coating without drenching them. This step is crucial for achieving that irresistible golden color and delicate crispness.
- Step 5: Place the baking sheet with the prepared baguette slices into your preheated oven. Bake for 8-12 minutes, or until the crostini are beautifully golden brown and crisp to the touch. Keep a close eye on them, as ovens vary, and they can go from perfectly toasted to burnt quite quickly! These baked crostini instructions emphasize vigilance to prevent over-browning.
- Step 6: Once they’ve reached that perfect golden hue, remove the crostini from the oven. Let them cool slightly on the baking sheet before serving. They’ll continue to crisp up as they cool, becoming the ideal base for all your favorite toppings.
There you have it! Delicious, homemade crostini ready in minutes. These easy baked crostini instructions will have you making perfect batches every time.
Pro Tips for the Best Crostini
Over the years, I’ve picked up a few tricks that consistently elevate my homemade crostini from good to absolutely amazing. These simple tips will ensure your toasted bread slices are always perfect, whether for a party or a quick snack.
- Always use a fresh, good-quality baguette; it makes a huge difference in texture and flavor.
- Don’t overcrowd the baking sheet; allow space around each slice for even toasting.
- Rub a fresh, cut garlic clove over the warm crostini immediately after baking for an extra burst of garlic flavor.
- Experiment with different herbs in your olive oil mixture, like a pinch of dried oregano or rosemary.
- Watch them closely in the oven; they can go from golden to burnt in a flash!
What’s the secret to perfect Crostini?
The real secret lies in the olive oil and garlic infusion, combined with precise baking. Coating your toasted bread slices for appetizers evenly with the garlic-infused oil ensures a golden, crispy exterior and a flavorful base. Also, don’t underestimate the power of fresh garlic!
Can I make Crostini ahead of time?
Absolutely! You can bake your crostini up to 3 days in advance. Just be sure to store them in an airtight container at room temperature once they’ve completely cooled. This means less stress on party day!
How do I avoid common mistakes with Crostini?
The most common mistake is over-baking, which leads to burnt or overly hard crostini. Another pitfall is not slicing the baguette evenly, resulting in some pieces burning while others are still soft. Always keep an eye on them and ensure uniform slices for the best results.
Best Ways to Serve Crostini
Once you’ve mastered making these perfectly crisp crostini, the real fun begins: serving them! I love how versatile they are, making them suitable for almost any occasion. Here are a few of my favorite ways to enjoy them:
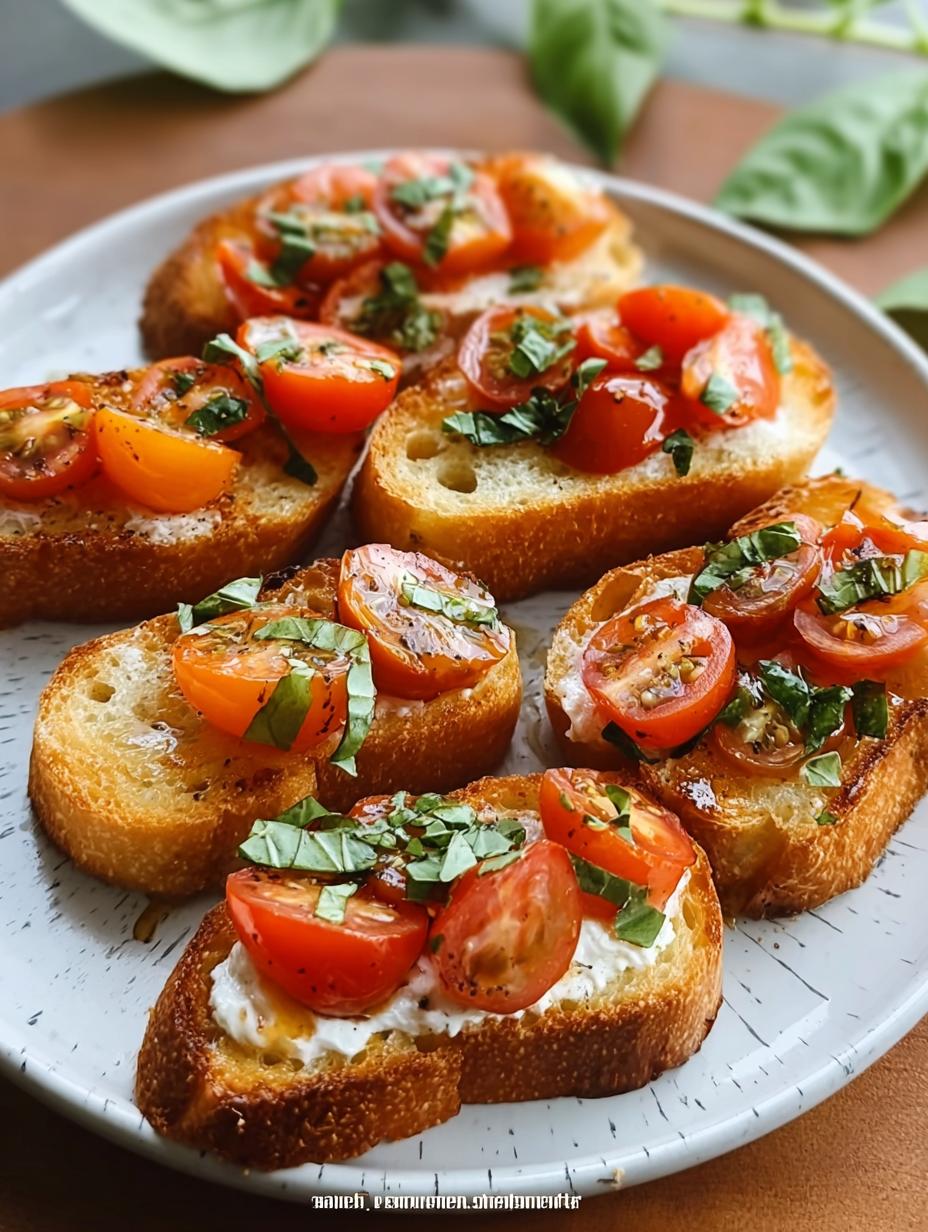
- For a classic Italian experience, I often top them with a fresh bruschetta mixture of diced tomatoes, basil, and a drizzle of balsamic glaze. This is one of the best crostini toppings for a vibrant appetizer.
- They also make an excellent base for various cheeses, from creamy goat cheese with fig jam to a sharp cheddar with apple slices.
- Don’t forget savory spreads like olive tapenade, hummus, or even a simple pesto. These provide quick and easy pairings.
You can also serve them alongside a hearty soup or a fresh green salad for added texture. The possibilities for delicious crostini are endless!

Nutrition Facts for Crostini
Curious about the nutritional breakdown of these delightful bites? Here’s what you can expect per serving, based on three crostini slices:
- Calories: 150
- Sugar: 1g
- Sodium: 180mg
- Fat: 7g
- Saturated Fat: 1g
- Unsaturated Fat: 6g
- Trans Fat: 0g
- Carbohydrates: 18g
- Fiber: 1g
- Protein: 3g
- Cholesterol: 0mg
Nutritional values are estimates and may vary based on specific ingredients used, such as the brand of baguette or olive oil.
How to Store and Reheat Crostini
Once you’ve gone to the effort of making delicious homemade crostini, you’ll want to ensure any leftovers stay fresh and crisp. Proper storage is key to maintaining their delightful texture. I always make a big batch, knowing they store well for later enjoyment.
For short-term storage, allow your crostini to cool completely after baking. Then, transfer them to an airtight container and store at room temperature. They’ll remain wonderfully crisp for up to 3-4 days. This homemade crostini preparation method ensures they’re ready for quick snacks.
If you’re planning for longer storage, you can freeze them for up to 3 months. Arrange the cooled crostini in a single layer on a baking sheet to freeze, then transfer to a freezer-safe bag. To reheat, simply pop them back into a 350°F (175°C) oven for a few minutes until crisp again.
Frequently Asked Questions About Crostini
What is the difference between crostini and bruschetta?
This is a common question, and I’m happy to clarify! Crostini literally means “little toasts” in Italian. They are typically made from a smaller, thinner sliced baguette and baked until very crisp. Bruschetta, on the other hand, is usually made from larger, thicker slices of a rustic Italian bread, often grilled or toasted, and then rubbed with garlic and drizzled with olive oil. While both are delicious bread-based appetizers, the size and preparation of the bread are the main distinctions between crostini vs bruschetta.
Can I use any type of bread to make crostini?
While a baguette is traditional and yields the best results for classic crostini, you can certainly experiment! I’ve had success using slender sourdough loaves or even ciabatta, sliced thinly. The key is to choose a bread with a relatively dense crumb and a good crust that can crisp up nicely without becoming too hard or crumbly. The goal is to create those perfect toasted bread slices for appetizers.
What are some simple crostini ideas for quick appetizers?
Oh, the possibilities are endless for easy crostini appetizers! For a quick bite, I love spreading them with goat cheese and a drizzle of honey, or a dollop of pesto with a cherry tomato. Another favorite is cream cheese topped with smoked salmon and a sprinkle of dill. For something sweet, try ricotta cheese with fresh berries. These simple crostini ideas prove you don’t need fancy ingredients for delicious results.
How long does homemade crostini last?
Once baked, your homemade crostini will stay fresh and perfectly crisp for up to 3-4 days when stored properly. Make sure they are completely cooled before placing them in an airtight container at room temperature. This prevents them from becoming soft or stale. They’re excellent for quick crostini snacks throughout the week!
Variations of Crostini You Can Try
One of the things I truly adore about crostini is its incredible versatility. Once you have the basic recipe down, you can easily play around with different flavors, textures, and even dietary needs. It’s a fantastic way to keep things fresh and exciting!
- Gluten-Free Crostini: Don’t let dietary restrictions stop you! Simply substitute a gluten-free baguette for a delicious alternative. The baking process remains the same, yielding perfectly crisp results.
- Herbed Crostini: For an aromatic twist, mix finely chopped fresh herbs like rosemary, thyme, or oregano into your olive oil mixture before brushing. This adds a wonderful depth of flavor to your crostini.
- Spicy Crostini: If you love a little kick, add a pinch of red pepper flakes to your olive oil. It gives the crostini a subtle warmth that pairs beautifully with creamy or savory toppings.
- Sweet Crostini: While often savory, crostini can also go sweet! Drizzle with honey and a sprinkle of cinnamon before baking, then top with fruit and mascarpone for a delightful dessert. These Italian crostini variations prove how adaptable they are.

Crostini: 1 Amazing Trick for Ultimate Crunch
- Total Time: 16 minutes
- Yield: 24 crostini slices 1x
- Diet: Vegetarian
Description
Make crisp, irresistible homemade crostini. This recipe transforms a baguette into a perfect base for various toppings. Prepare these delightful bites in just 16 minutes.
Ingredients
- 1 baguette, sliced into 1/2-inch rounds
- 2 tablespoons olive oil
- 1 clove garlic, minced
- Pinch of salt
- Pinch of black pepper
Instructions
- Preheat your oven to 375°F (190°C).
- Arrange the baguette slices in a single layer on a baking sheet.
- In a small bowl, combine the olive oil, minced garlic, salt, and pepper.
- Brush each side of the crostini bread slices with the olive oil mixture.
- Bake for 8-12 minutes, or until the crostini are golden brown and crisp. Watch them carefully to prevent burning.
- Remove the crostini from the oven and let them cool slightly before serving.
Notes
- For extra flavor, rub a cut garlic clove over each toasted crostini slice while still warm.
- Store leftover crostini in an airtight container at room temperature for up to 3 days.
- These easy crostini appetizers are versatile; try them with bruschetta, cheese spreads, or various crostini toppings.
- You can also make quick crostini snacks by topping them with simple ingredients like diced tomatoes and basil.
- Prep Time: 5 minutes
- Cook Time: 11 minutes
- Category: Appetizer
- Method: Baking
- Cuisine: Italian
Nutrition
- Serving Size: 3 crostini slices
- Calories: 150
- Sugar: 1g
- Sodium: 180mg
- Fat: 7g
- Saturated Fat: 1g
- Unsaturated Fat: 6g
- Trans Fat: 0g
- Carbohydrates: 18g
- Fiber: 1g
- Protein: 3g
- Cholesterol: 0mg