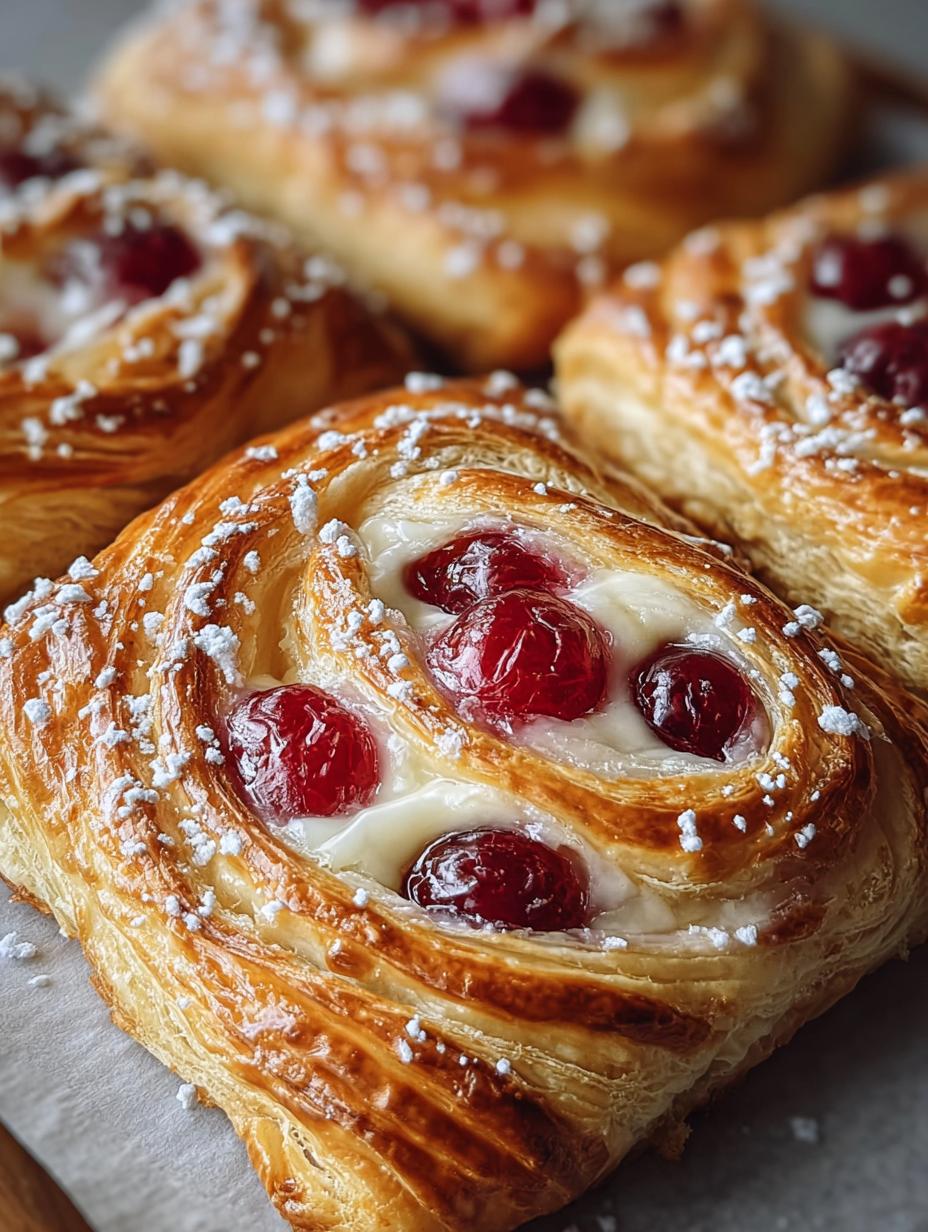
Cherry Danish Pastry Treats has been a staple in my home ever since I tasted my grandmother’s version, a rich and buttery pastry filled with sweet cherries. I remember the aroma filling her kitchen, a comforting blend of warm fruit and delicate pastry. This easy cherry danish pastry recipe brings back all those wonderful memories, allowing me to recreate that bakery-quality taste right in my own kitchen. You’ll love how simple it is to make these delicious cherry breakfast pastries. Let’s get cooking!
Why You’ll Love This Cherry Danish Pastry Treats
I know you’re going to adore these Cherry Danish Pastry Treats for so many reasons. They truly are a delightful indulgence that brings joy with every bite.
- They’re incredibly easy to make, perfect for busy mornings or unexpected guests.
- The combination of sweet cherry and creamy cheese filling is simply irresistible.
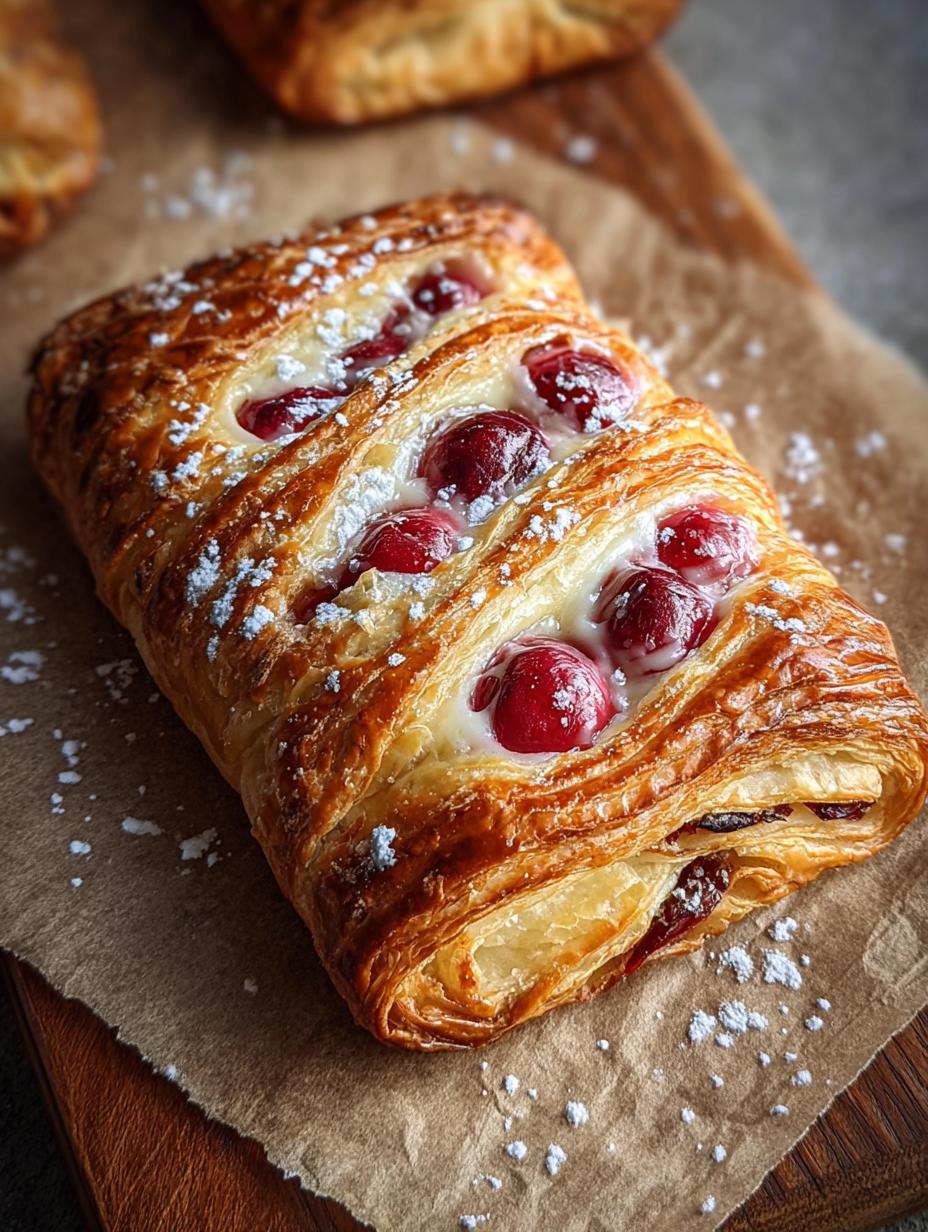
- You’ll achieve a wonderfully flaky cherry danish texture thanks to the puff pastry.
- This recipe is much more budget-friendly than buying individual pastries from a store.
- It’s a fantastic way to enjoy a bakery style cherry danish right at home without the fuss.
- These treats are a guaranteed crowd-pleaser, perfect for family breakfasts or brunches.
Ingredients for Cherry Danish Pastry Treats
Gathering your ingredients is the first step to creating these delightful Cherry Danish Pastry Treats. I’ve found that having everything ready makes the baking process so much smoother and more enjoyable. Here’s what you’ll need for this easy recipe:
- 17.3 oz thawed puff pastry (1 pack) – This is the secret to a quick and delicious puff pastry cherry danish, providing that wonderful flaky base.
- 21 oz canned cherry pie filling (1 can) – Choose your favorite brand for a burst of sweet cherry flavor.
- 8 oz cream cheese, softened – Make sure it’s at room temperature for a smooth, lump-free filling.
- 1/4 cup granulated sugar – Just enough to sweeten the cream cheese.
- 1 tsp vanilla extract – Enhances the overall flavor profile.
- 1 large egg – For the egg wash, giving the pastries a beautiful golden sheen.
- 2 tsp water – Mixed with the egg for the perfect wash consistency.
- 1/2 cup powdered sugar – For a delicate dusting or quick icing.
- 2 tsp whole milk – If you opt for a simple icing, this will be your liquid.
How to Make Cherry Danish Pastry Treats
Making these delightful Cherry Danish Pastry Treats is surprisingly straightforward, and I promise you’ll find the process enjoyable. Just follow these steps, and soon your kitchen will be filled with the irresistible aroma of a freshly baked homemade cherry danish. I’ve broken it down to make it super easy for you!
- Step 1: First things first, ensure your puff pastry is thawed. If it’s still frozen, take it out of the freezer and let it sit at room temperature. This usually takes about 30-40 minutes.
- Step 2: In a mixing bowl, combine your softened cream cheese, granulated sugar, and vanilla extract. Use a hand mixer or a stand mixer to blend these ingredients until the mixture is beautifully smooth and creamy. Set this delectable filling aside.
- Step 3: Prepare two baking sheets by lining them with parchment paper. Lightly dust your workspace with a little flour. Carefully unfold one thawed pastry sheet and gently roll it out slightly to form a rectangle, roughly 9×11 inches.
- Step 4: Using the natural folds as a guide, cut the pastry into 6 even-sized triangles. Repeat this process with the second pastry sheet, giving you a total of 12 pastry triangles. Don’t worry if they aren’t perfectly uniform; homemade charm is part of the appeal!
- Step 5: Gently score a 1/4-inch border around the edge of each triangle. Be careful not to cut all the way through the pastry. This border will help create that classic danish look and hold in the delicious filling.
- Step 6: With a fork, poke a few holes in the center of each pastry triangle. This simple trick helps the border rise higher than the center, ensuring a perfect pocket for your danish pastry with cherry filling.
- Step 7: Transfer the 12 pastry triangles to your prepared baking sheets. Now, divide the cream cheese mixture evenly among the pastries, spreading about 2 tablespoons into the center of each. Then, top each with about 2 tablespoons of the vibrant cherry pie filling.
- Step 8: Place the assembled pastries in the refrigerator to chill for at least 15 minutes. I’ve found this step is crucial for achieving puffier, more beautiful pastries during baking.
- Step 9: While your pastries are chilling, preheat your oven to 400°F (200°C). This ensures a hot oven for that perfect puff.
- Step 10: In a small bowl, whisk together the large egg and 2 teaspoons of water to create an egg wash. Using a pastry brush, lightly brush this egg wash onto the outer border of each pastry. This gives them a gorgeous golden-brown finish.
- Step 11: Bake the pastries for 18 to 22 minutes, or until they are beautifully golden brown and wonderfully flaky. Keep an eye on them, as oven temperatures can vary.
- Step 12: Once baked, remove the Cherry Danish Pastry Treats from the oven and let them cool on the baking sheets for 5-10 minutes.
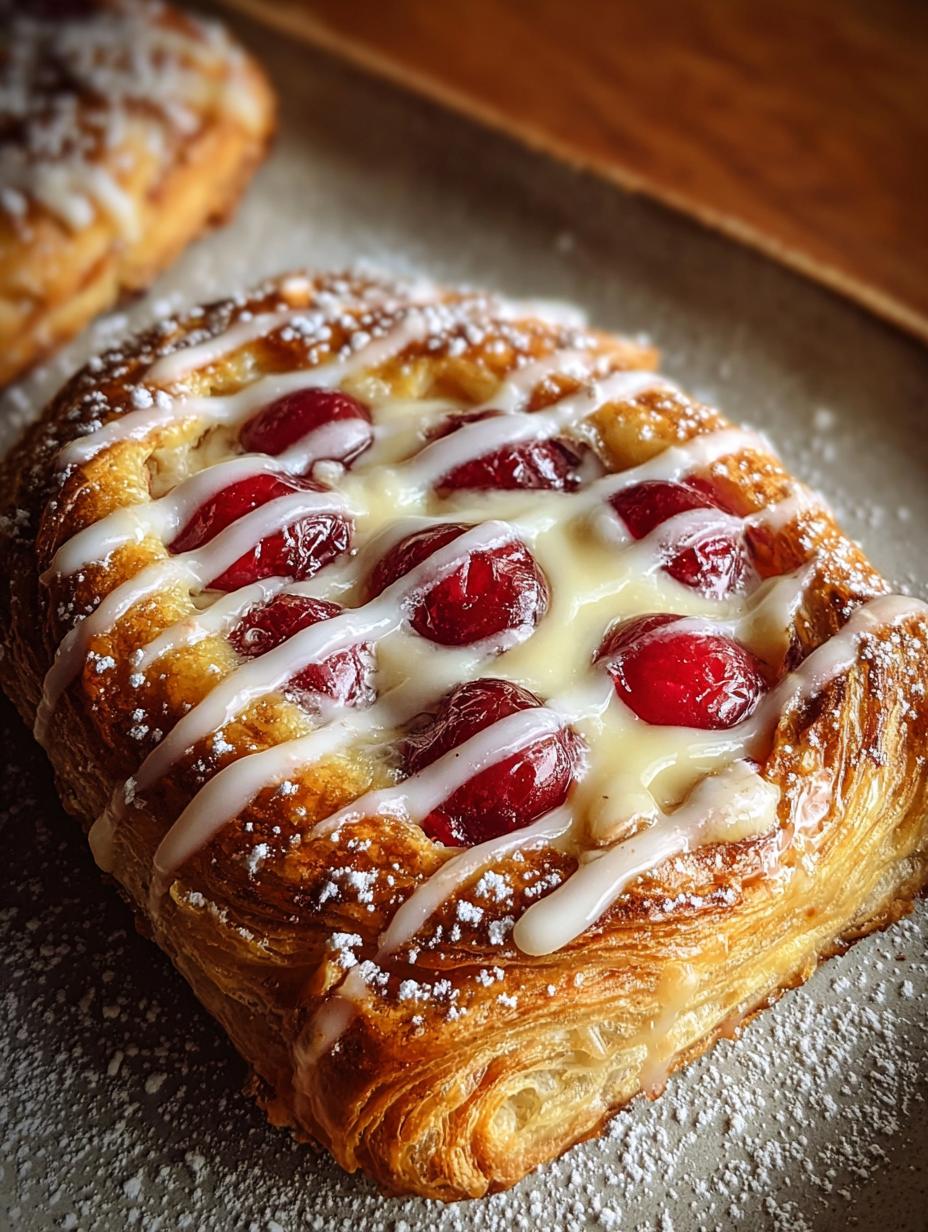
- Step 13: For an extra touch of sweetness, dust the cooled pastries generously with powdered sugar. You can also drizzle them with a simple icing made from powdered sugar and milk if you prefer.
- Step 14: Serve warm or chilled, whichever you prefer. I love them slightly warm with a cup of coffee. Enjoy these sweet cherry pastries!
Pro Tips for the Best Cherry Danish Pastry Treats
I’ve learned a few tricks over the years that truly elevate these Cherry Danish Pastry Treats from good to absolutely amazing. Following these expert tips will help you achieve bakery-quality results every single time. Don’t skip these little details!
- Always use cold puff pastry. If it gets too warm during handling, pop it back in the fridge for 10-15 minutes.
- Don’t overfill the pastries. Too much filling can make them soggy and prevent proper puffing.
- Chill the assembled pastries before baking. This step is crucial for that beautiful, flaky texture.
- Use good quality cherry pie filling for the best flavor.
- Let the pastries cool slightly before dusting with powdered sugar to prevent melting.
What’s the secret to perfect Flaky Cherry Danish?
The real secret to a perfectly flaky cherry danish lies in using cold puff pastry and chilling the assembled pastries before baking. This helps the butter in the pastry create distinct layers. It’s part of what makes this the best cherry danish recipe!
Can I make Cherry Danish Pastry Treats ahead of time?
Yes, absolutely! You can assemble the Cherry Danish Pastry Treats up to the point of baking, then cover them loosely with plastic wrap and refrigerate for up to 24 hours. Just add a few extra minutes to the baking time if they are going into the oven cold.
How do I avoid common mistakes with Homemade Cherry Danish?
To avoid common pitfalls with your Homemade Cherry Danish, first, ensure your cream cheese is softened for a smooth filling. Second, don’t overfill the pastries; less is more here. Lastly, make sure your oven is fully preheated for an even bake and optimal puff.
Best Ways to Serve Cherry Danish Pastry Treats
These delightful Cherry Danish Pastry Treats are incredibly versatile and perfect for a variety of occasions. I love serving them in ways that highlight their sweet, fruity goodness and flaky texture. Here are a few of my favorite suggestions:
- For a classic breakfast or brunch, serve them warm alongside a freshly brewed cup of coffee or a glass of chilled orange juice. The warmth brings out the rich cherry flavor beautifully.
- Elevate your afternoon tea experience by offering these sweet cherry pastries with a dollop of whipped cream or a light dusting of extra powdered sugar. They pair wonderfully with a mild black tea or a fruity herbal infusion.
- As a simple yet elegant dessert, present them slightly warm with a scoop of vanilla bean ice cream. The contrast between the warm pastry and cold ice cream is absolutely divine.
Nutrition Facts for Cherry Danish Pastry Treats
For those mindful of their dietary intake, here’s a breakdown of the nutritional information for these delicious Cherry Danish Pastry Treats. Each serving is based on one pastry from a recipe yielding 12:
- Serving Size: 1 pastry
- Calories: 210
- Protein: 3g
- Fat: 9g
- Saturated Fat: 4g
- Unsaturated Fat: 2g
- Trans Fat: 0g
- Carbohydrates: 30g
- Fiber: 1g
- Sugar: 8g
- Sodium: 160mg
- Cholesterol: 40mg
Nutritional values are estimates and may vary based on specific ingredients and brands used.
How to Store and Reheat Cherry Danish Pastry Treats
Once you’ve enjoyed your freshly baked Cherry Danish Pastry Treats, you might wonder how to keep them delicious for later. Proper storage is key to maintaining their flaky texture and sweet flavor. I always make sure they’re completely cool before putting them away.
For short-term storage, place the cooled pastries in an airtight container at room temperature for up to 2 days. For longer freshness, I store them in an airtight container in the refrigerator for 3-4 days. These cherry breakfast pastries hold up beautifully!
If you’re planning further ahead, you can freeze them for up to 3 months. Wrap each pastry individually in plastic wrap, then place them in a freezer-safe bag or container. To reheat, simply warm them in a preheated oven at 300°F (150°C) for 10-15 minutes until heated through, or microwave for 15-30 seconds for a quick treat.
Frequently Asked Questions About Cherry Danish Pastry Treats
What is a cherry danish?
A cherry danish is a sweet pastry, typically made with a flaky, buttery dough (often puff pastry) that is filled with a sweet cream cheese mixture and a cherry fruit filling. It’s often enjoyed as a breakfast item, brunch treat, or a dessert. My recipe for Cherry Danish Pastry Treats offers a homemade version that’s both easy and incredibly delicious.
Can I use a different fruit filling for these Cherry Danish Pastry Treats?
Absolutely! While these are Cherry Danish Pastry Treats, you can easily swap out the cherry pie filling for other fruit fillings like apple, blueberry, or even peach. The cream cheese base pairs wonderfully with almost any fruit, so feel free to experiment and find your favorite flavor combination.
Why are danishes called danishes?
The origin of the danish pastry, or “wienerbrød” in Danish, stems from a bakers’ strike in Denmark in 1850. Austrian bakers were brought in as replacement workers, and they introduced their traditional pastry-making techniques. The Danes then adapted these methods, adding more fat to the dough and creating the distinct flaky, rich pastry we know today as a danish. So, while the technique has Austrian roots, the Danish perfected it!
How can I make my Cherry Danish Pastry Treats look more professional?
To give your Cherry Danish Pastry Treats a more professional, bakery-style appearance, focus on neat scoring and even distribution of the filling. Brushing the edges with an egg wash before baking gives them a beautiful golden sheen. For extra flair, you can drizzle a simple powdered sugar glaze over them after they’ve cooled slightly.
Variations of Cherry Danish Pastry Treats You Can Try
While I absolutely adore the classic Cherry Danish Pastry Treats, sometimes it’s fun to experiment and mix things up! These pastries are incredibly versatile, allowing for several delicious variations to suit different tastes or dietary needs. You can easily adapt the base recipe to explore new flavors and textures.
- Fruit Swap: Instead of cherry, try using other canned pie fillings like blueberry, apple, or even peach. The cream cheese base pairs beautifully with almost any fruit, making it a simple way to create new Cherry Danish Pastry Treats.
- Nutty Crunch: For added texture and flavor, sprinkle some chopped almonds or pecans over the cherry filling before baking. This gives your pastries a delightful crunch and a more complex taste.
- Chocolate Drizzle: After baking and cooling, drizzle melted dark or white chocolate over your cherry cheese danish for an extra layer of indulgence. It’s a fantastic way to elevate the dessert factor.
- Low-Sugar Option: If you’re watching your sugar intake, opt for a sugar-free cherry pie filling and use a sugar substitute in the cream cheese mixture. You can still enjoy these sweet treats with less guilt!

Cherry Danish Pastry Treats: 12 Divine Bites
- Total Time: 52 minutes
- Yield: 12 pastries 1x
- Diet: Vegetarian
Description
This cherry danish pastry recipe offers a delightful treat for any time of day. It features flaky puff pastry, a creamy cheese filling, and sweet cherry pie filling. This easy cherry danish is perfect for busy mornings or as a quick dessert.
Ingredients
- 17.3 oz thawed puff pastry (1 pack)
- 21 oz canned cherry pie filling (1 can)
- 8 oz cream cheese, softened
- 1/4 cup granulated sugar
- 1 tsp vanilla extract
- 1 large egg
- 2 tsp water
- 1/2 cup powdered sugar
- 2 tsp whole milk
Instructions
- If the puff pastry is frozen, remove it from the freezer and allow it to thaw at room temperature.
- In a mixing bowl, add the softened cream cheese, granulated sugar, and vanilla extract. Using a hand mixer or stand mixer, blend until smooth and creamy. Set aside.
- Line two baking sheets with parchment paper (9×13 sheets or larger). Dust your workspace with flour. Unfold a thawed pastry sheet and roll it out slightly to form a 9×11 inch rectangle. (Optional: Skip rolling for smaller pastries.)
- Cut the pastry into 6 even-sized triangles using the folded lines as a guide. Repeat with the second pastry sheet for a total of 12 triangles.
- Gently score a 1/4-inch border around the edge of each triangle. Do not cut through the pastry.
- Using a fork, poke a few holes in the center of each triangle to help the border rise higher than the center.
- Transfer the 12 pastry triangles to the prepared baking sheets. Divide the cream cheese mixture evenly (about 2 tablespoons per pastry), spreading it in the center. Top each with about 2 tablespoons of cherry pie filling.
- Place the assembled pastries in the refrigerator to chill for at least 15 minutes. This helps achieve puffier and more beautiful pastries during baking.
- Preheat the oven to 400°F.
- In a small bowl, whisk together 1 egg and 2 tsp of water. Using a pastry brush, lightly brush the egg wash onto the outer border of each pastry.
- Bake the pastries for 18 to 22 minutes, or until golden brown and flaky.
- Once baked, remove the cherry danish pastries from the oven and allow them to cool for 5-10 minutes.
- Dust the pastries with powdered sugar. Optional: Drizzle with icing for extra sweetness.
- Serve warm or chilled, as preferred. Enjoy these sweet cherry pastries!
Notes
- For best results, chill the pastries before baking.
- Can be served warm or chilled, based on preference.
- To make a quick icing, mix powdered sugar and whole milk until smooth.
- Consider adding a pinch of almond extract to the cream cheese mixture for extra flavor in your homemade cherry danish.
- Oven temperatures can vary, so keep an eye on your bakery-style cherry danish while baking.
- Prep Time: 30 minutes
- Cook Time: 22 minutes
- Category: Dessert
- Method: Baking
- Cuisine: American
Nutrition
- Serving Size: 1 pastry
- Calories: 210
- Sugar: 8g
- Sodium: 160mg
- Fat: 9g
- Saturated Fat: 4g
- Unsaturated Fat: 2g
- Trans Fat: 0g
- Carbohydrates: 30g
- Fiber: 1g
- Protein: 3g
- Cholesterol: 40mg